Grove Serial LCD V1.0
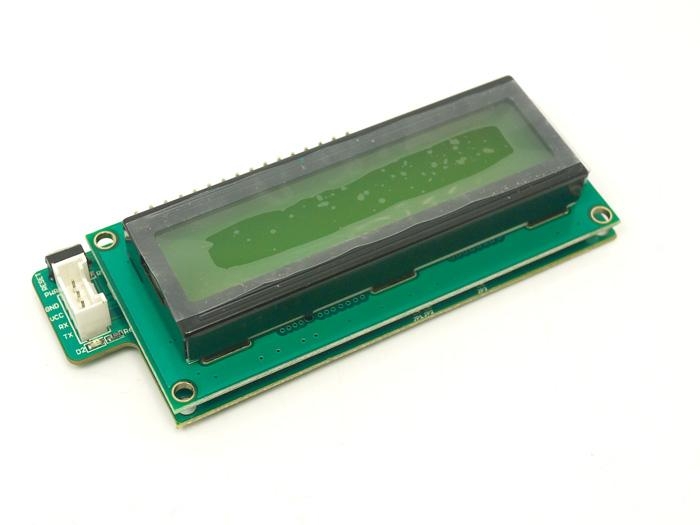
Grove - Serial LCD V1.0 is the new version of our serial LCDs. Attached on a single board is a 16x2 LCD and an embedded circuit based around a PIC HD44780. The on-board PIC takes a TTL serial input and prints the characters it receives onto the LCD. The library also allows for a number of special commands so you can clear the screen, adjust the backlight brightness, turn the display on/off, and more.
This LCD makes for a great gift, because it can be used for so many different projects!
Features
Very easy to use.
baudrate:9600
4-Pin Connection ( 2 I/Os and 2 Power Pins) .
API design similar to Arduino LiquidCrystal Library.
Module automatically returns to listening mode.
Comes with a rich set of demo applications.
Back light control to save power.
Application Ideas
LCD display for Seeeduino / Arduino / any microcontroller board.
Time and Temperature Displays with a RTC and Temperature Sensor.
Acceleration display with an Accelerometer.
Heading Angle display with a Compass.
Your imagination is the limit.
PC CPU Vital Status display: Can be interfaced to PC with a suitable UART Trans-receiver.
Specification
Item
Min
Typ
Maxi
Unit
Operation voltage
4.7
5
5.5
V
Communication Protocol
UART
-
Backlight Control
Yes
-
Working Current:Backlight ON
70
75
80
mA
Working Current:Backlight OFF
15
20
25
mA
Usage
Hardware Installation
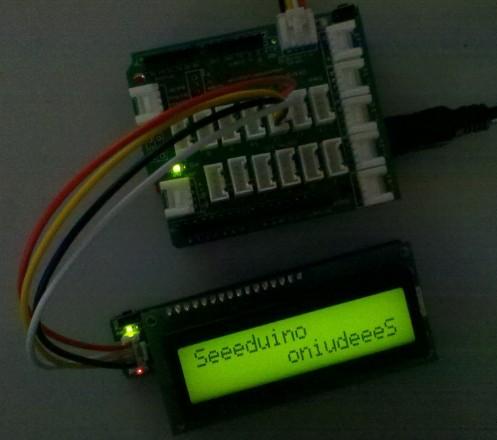
Ensure Seeeduino operating voltage is set to 5V
Connect the Serial LCD to Seeeduino (title=undefined) Software UART(Pin 11, Pin12) through the Grove Base board terminal using the 4 pin connector.
Press Reset Switch after uploading the firmware to Seeeduino.
Programming
Serial LCD library provides a rich set of APIs to interact with Serial LCD Module. All operations that could be performed with normal LCDs could be achieved by sending commands and data serially. The APIs are designed similar to LiquidCrystal library of Arduino, for instant migration to Serial LCD driver. Interaction with Serial LCD module begins with initialization,wherein the Serial LCD module sends instruction to the MCU to begin communication. After intitialization, the LCD gets into Working mode, where it starts accepting commands and data for display. The commands and responses involved in the interaction are summarized at [1]
Demonstration Applications
Download the SerialLCD Library and Unzip it into the libraries file of Arduino IDE by the path: ..\arduino-1.0.1\libraries, then you can play with your own display system.
If you have Arduino 1.0 or later, NewSoftSerial is included in the Arduino core (named SoftwareSerial). Note:When you have connected Serial LCD to Grove and downloaded the example to the Seeeduino/arduino, make sure you reset the Seeeduino/arduino first.
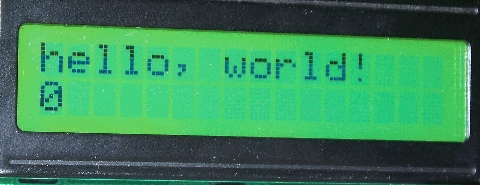
Demo 1: Hello World
OUTPUT:
Demo 2: Intermittently display
OUTPUT: 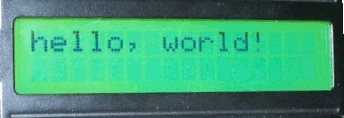
Demo 3: Blink
OUTPUT: 
Demo 4: Cursor Display
OUTPUT: 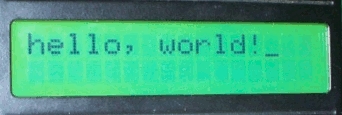
Demo 5: Display Text Flow Direction and Cursor Position
OUTPUT: 
Reference
Serial LCD library provides complete set of instruction to exercise the capabilities of LCD1602. SerialLCD driver uses NewSoftSerial library for implementing the UART logic. The access to the APIs are made by first creating an object of SerialLCD class by providing the software serial ports (Rx and Tx):
Function Description: 1.begin()
This function is used for initializing the Serial LCD module.
Example:
2.print()
Prints the text to the LCD. It is of two forms:
Example:
3.clear()
Clears the display.
Example:
4.home()
Sets the cursor to top-left corner.
Example:
5.noDisplay()
Switch off the display without clearing the RAM.
Example:
6.display()
Switch on the display after the noDisplay(). The text existing in the RAM are restored.
Example:
7.noBlink()
Switch off the blinking LCD cursor.
Example:
8.blink()
Display a blinking LCD cursor. If used with SLCD_CURSOR_ON, the result will be different on different displays.
Example:
9.noCursor()
Hide the LCD Cursor.
Example:
10.cursor()
Show the LCD Cursor.
Example:
11.scrollDisplayLeft()
Scroll the contents of the display(text and cursor), one place to the left.
Example:
12.scrollDisplayRight()
Scroll the contents of the display(text and cursor), one place to the right
Example:
13.leftToRight()
Set the direction of text written to the LCD to "left-to-right", the default. This indicates that the subsequent characters written to the display will go from left to right, but does not affect previously-output- text.
Example:
14.rightToLeft()
Set the direction of text written to the LCD to "right-to-left". This indicates that the subsequent characters written to the display will go from right to left, but does not affect previously output text.
Example: <>preslcd.rightToLeft(); // Set the text flow direction right to left</pre> 15.autoscroll()
Switch On automatic scrolling of LCD text. This makes each character on the display push previous characters over by one position.If the current text direction is left-to-right(the default), the display scrolls to the left.
Example:
16.noAutoscroll()
Switch Off automatic scrolling of LCD text.
Example:
17.setCursor()
Set the cursor to (Column,Row) position.
Example:
18.noPower()
Turn off the LCD power and the backlight, but the MCU power is still on.
Example:
19.power()
Turn on the LCD power but not the backlight.
Example:
20.noBacklight()
Turn off the backlight.
Example:
21.backlight()
Turn on the backlight.
Example:
22.noPower() (new)
Turn off the LCD power and the backlight, but the MCU power is still on.
Example:
23.power() (new)
Turn on the LCD power but not the backlight.
Example:
24.noBacklight() (new)
Turn off the backlight.
Example:
25.backlight() (new)
Turn on the backlight.
Example:
Version Tracker
Revision
Descriptions
Release
v1.0b
Second Version
20 Mar 2011
Resources
[Eagle] Schematic and Board Files
[Library] SerialLCD Library for v1.0b and v1.1b
[repository] github repository for SerialLCD
[Library] NewSoftLibrary
[Library] a small fix to v1.0b-Library for begin() not following the correct protocol
Support
If you have questions or other better design ideas, you can go to our forum or wish to discuss.
Last updated
Was this helpful?