Grove Base Shield for Photon

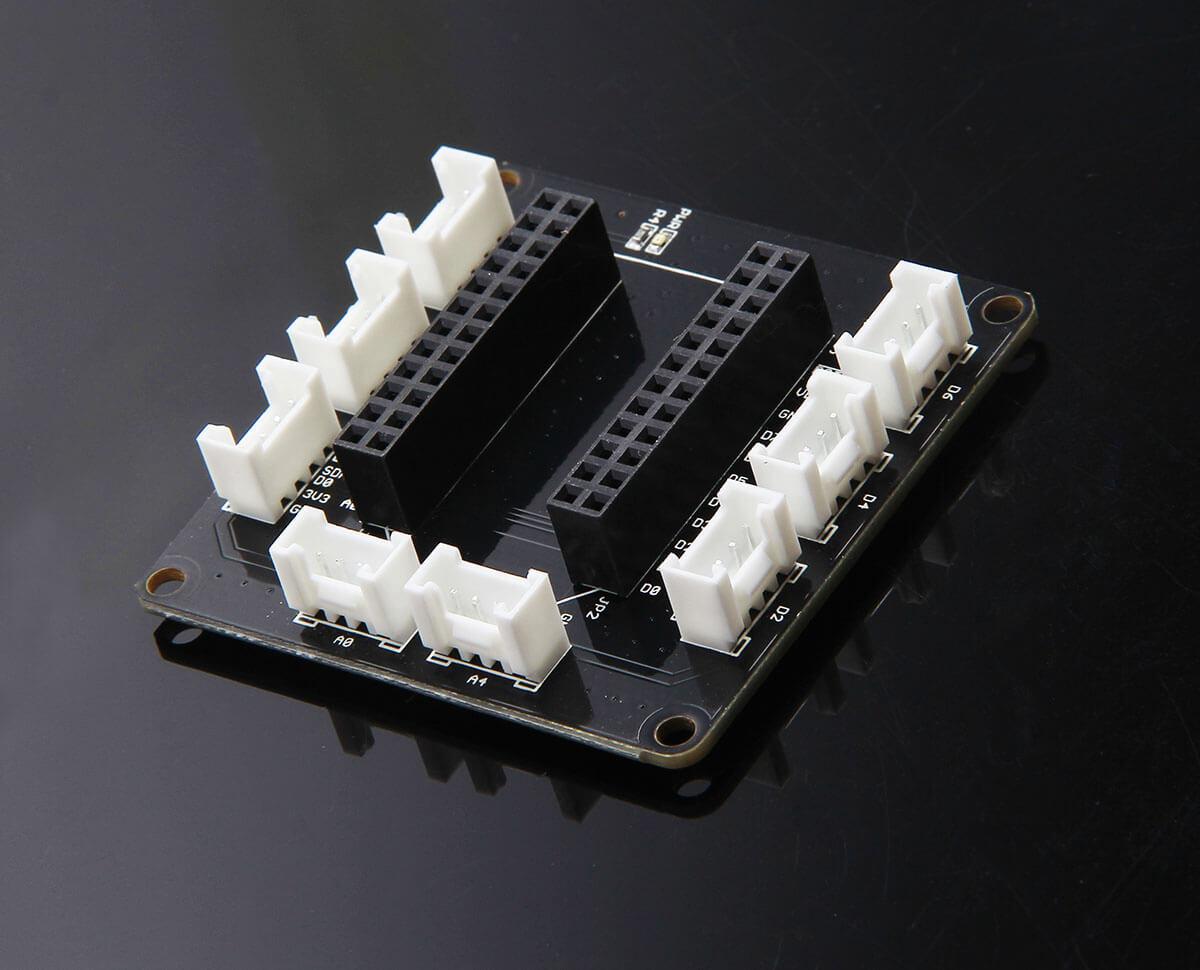
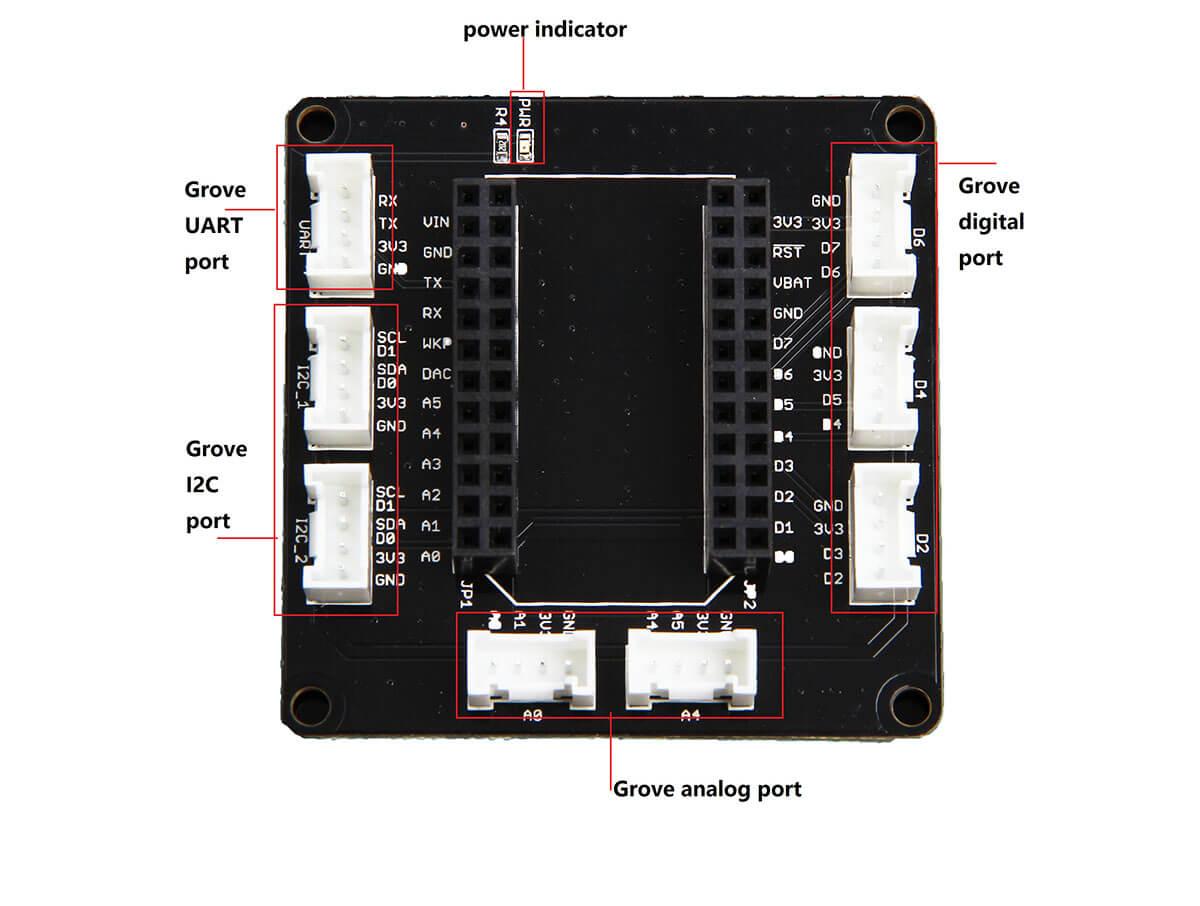
Grove Base Shield for Photon is an expansion shield board which incorporate Grove port on which you can build more powerful and intelligent applications with much richer and cost-effective Grove functional modules. It gets three digital ports, two analog ports, two I2C ports and one UART port. It a kind of plug-and-play board which will accelerate your prototyping process dramatically.
Features
Grove interfaced
Connect to massive and low-cost Grove modules
I2C, UART ports integrated
Application ideas
Compact IoT applications such as smart router.
Specification
Grove ports
3 digital ports 2 analog ports 2 I2C ports 1 UART port.
Dimensions
53 × 53 mm
Weight
18g
Hardware Overview

Parts list
Parts name
Quantity
Grove Base Shield for Photon
1PC
Getting Started
Note: In this case we show you a general development environmental.
Material required
Particle Photon × 1
USB cable (type A to micro type-B) × 1
A PC or Mac
Grove Base Shield for Photon × 1
Grove - Buzzer × 1
Buzzing
1. Refer to [here](https://docs.particle.io/guide/getting-started/connect/core/) to connect to a device (PC or Mac).
!!!Note 1. We recommend that you choose node.js v4.2.3 LTS especially for Windows 10 user. 2. You may need to one more steps after run command particle setup, that is, connect you device (PC or Mac) to a wi-fi AP whose name contain Photon, especially on Windows 10.
2. Use [Web IDE](https://build.particle.io/) for your project. Login with your account and choose your device (click the 2nd last icon on left column).
!!!Note We recommend you choose Web IDE to compile or flashing your code to Photon which is much quicker than using Particle Dev, if your internet connectivity is not so good.
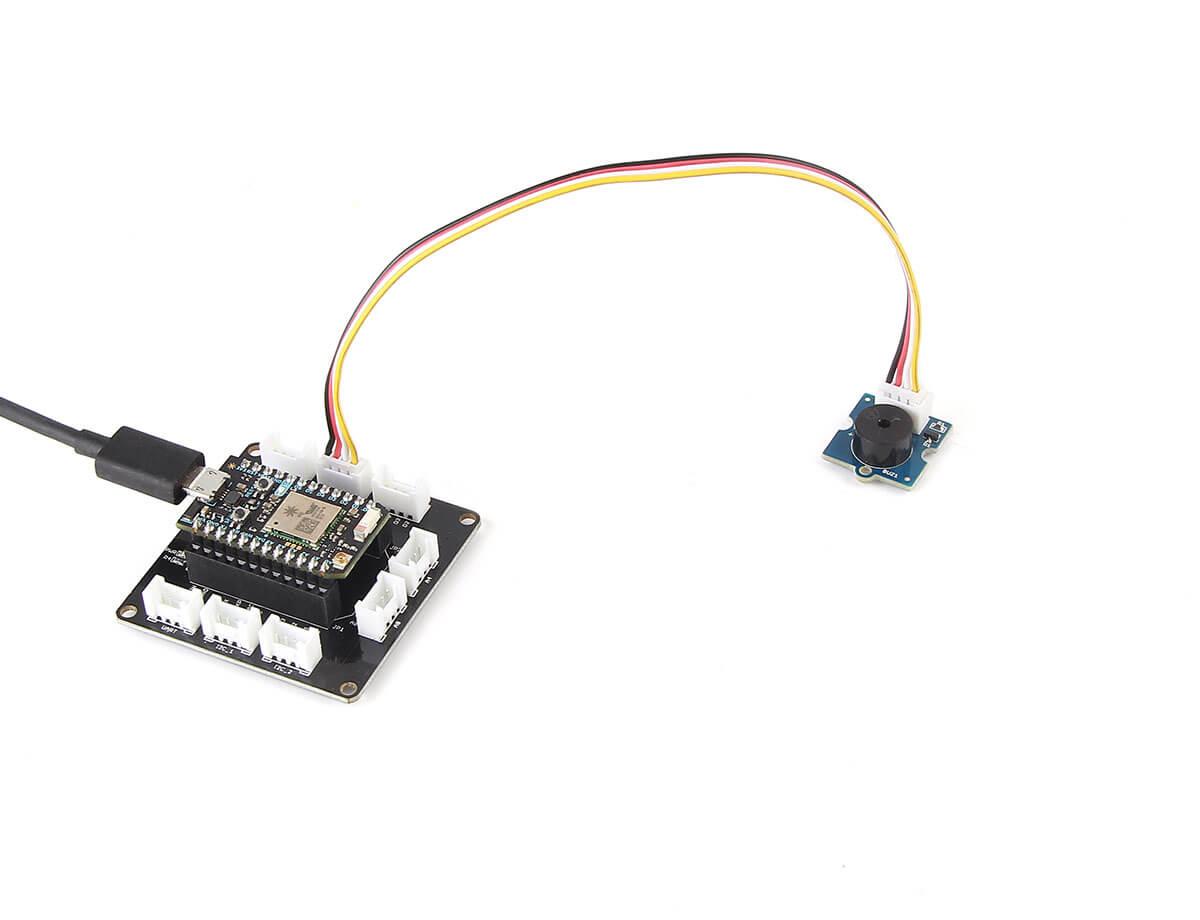
3. Connect them like following:

4. Now you can copy following code to Web IDE and flash them to Photo by clicking a lighting-like icon (the 1st icon on left column).
!!!Note Copy the code only to the tab named filename.ino.
Resources
Last updated