
Grove Joint v2.0
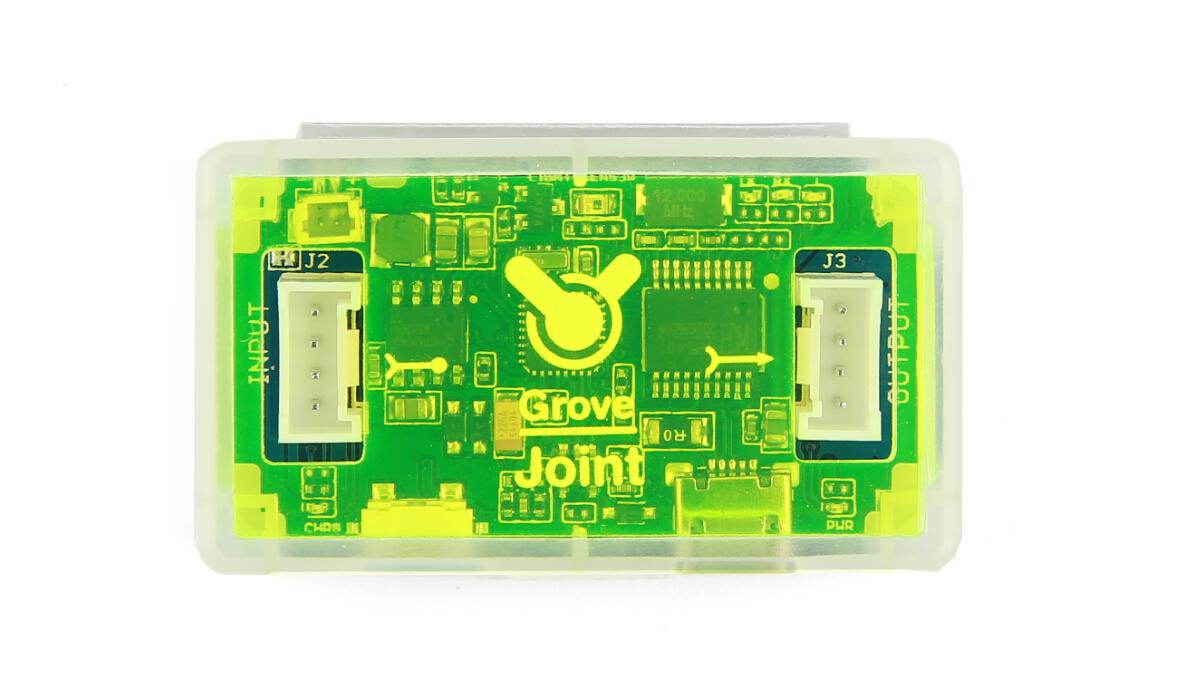
Grove - Joint v2.0 shares many similarities with Seeeduino Lotus. It is a mini ATMEGA328 Microcontroller development board. It uses an Atmel ATMEGA328P-MU and CH340. ATMEGA328P-MU is a high performance, low power AVR 8-Bit Microcontroller. CH340 is a USB bus converter chip that can realize a USB to serial interface. Grove - Joint v2.0 has two Grove interfaces included I2C port and two digital I/Os. It else support battery powered. You can do some simple applications with it.
Specifications
Microcontroller: ATmega328P-MU
Operating Voltage: 5V
Digital I/O Pins: 2
I2C Port: 1
Analog Input Channels: 2 (multiplex with I2C)
DC Current per I/O Pin: 40 mA
Flash Memory: 32 KB (ATmega328P-MU)
RAM: 2 KB (ATmega328P-MU)
EEPROM: 1 KB (ATmega328P-MU)
Clock Speed: 12 MHz
Hardware Overview
Here is block diagram of Grove - Joint module which consists of following parts.
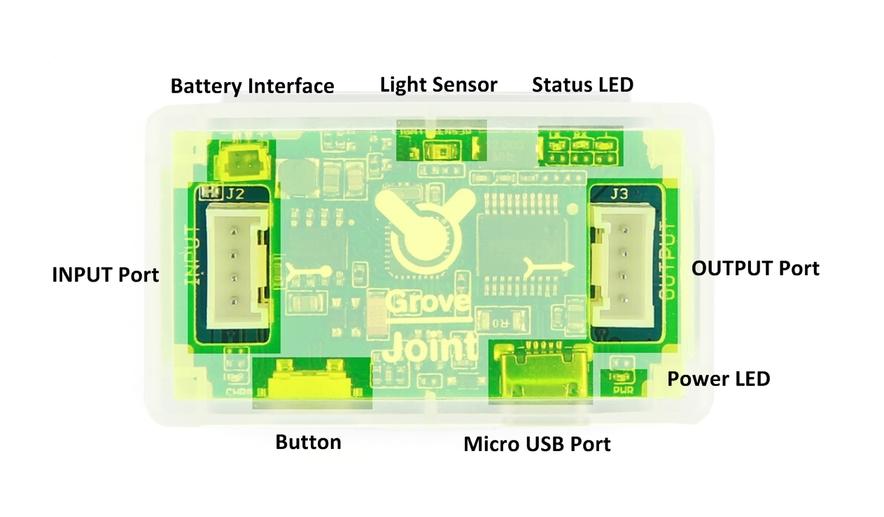
Battery Interface - This moudle can battery powered.
Light Sensor - There's a light sensor on the board which is connected to A0 pin.
Status LED - There're 3 LEDs indicate the status of the board. TX(D1), RX(D0) and L(D10)
INPUT Port - The INPUT Port is a Grove I2C interface as well as two analog channels(A4 & A5).
OUTPUT Port - The OUTPUT Port is a Grove Interface too including two digital I/Os (D3 & D5).
Button - The button is connected to D2 , It can be used as a switch as well.
Micro USB Port - It can be used for power supply and download the code.
Power LED - The LED+ connect to VCC and LED- connect to D6, you can turn D6 HIGH to turn off this led to save power.
CHRG LED - The LED+ connect to VCC and LED- connect to A3, you can turn A3 HIGH to turn off this led to save power.
Application Ideas
Battery Powered Toys
Mini Applications
Wearable electronics
Baby monitor
Getting Started
Now, Let's begin to use the mini Arduino board .
Driver Install
Grove - Joint v2.0 uses CH340 to download. It needs a driver to be installed.
Windows/Linux
Totally compatible with serial application program in computer endpoint Windows operation system
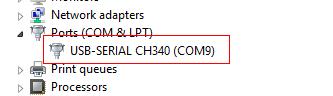
1) Plug it to computer's USB Port.
2) Wait till you find it in Device Manager.
3) If you do not find the port, please download the Driver from Here
Mac OS
Download the driver from here: http://www.wch.cn/download/CH341SER_MAC_ZIP.html
On Mac OS Yosemite:
1) Download and install the CH340/CH341 driver package
2) Open Terminal program (located in /Applications/Utilities/)
3) Type command:
sudo nvram boot-args="debug=0x146 kext-dev-mode=1"4) Enter your password for sudo
5) Restart your computer
The driver is not signed in Yosemite, so you need to bypass the signed driver check.
If you want restore your Mac’s setting, you can exit developer mode by redefining the boot-arg to your previous settings, or clear your boot-args as follows: sudo nvram -d boot-args
To see what the current boot-args are, if any, type: sudo nvram boot-args
Preparations
Now we are making a demo for Grove - Joint v2.0 which require following modules.
Grove - Joint is compatible with Arduino. If this is your first time using Arduino, Please put hand on here to start your Arduino journey.
Hardware Installation
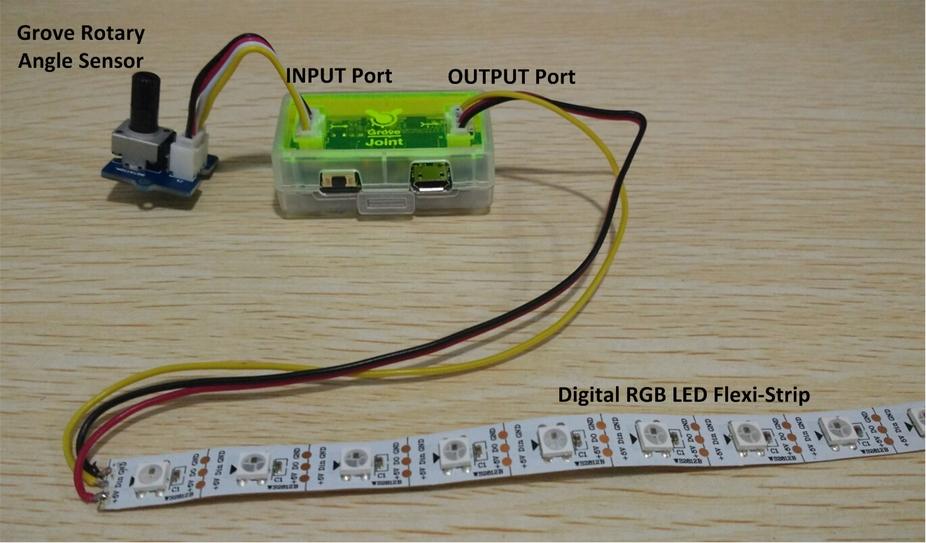
Grove - Joint got two Grove sockets for connecting two modules above : They are:
Grove Rotary Angle Sensor - connect to Grove Input port
Digital RGB LED Flexi-StripGrove - connect to Grove Output port
As shown below:
Software Work
Connect Grove - Joint to computer use a micro USB cable, if the status LED not blink , press the button .
Click here to download testing code and decompress it to any folders(e.g. Drive D or desktop)
Now you need simple configurations for Arduino sketchbook.
Launch Arduino IDE and click File>Preferences and add absolute location for downloaded testing code at Sketchbook location.

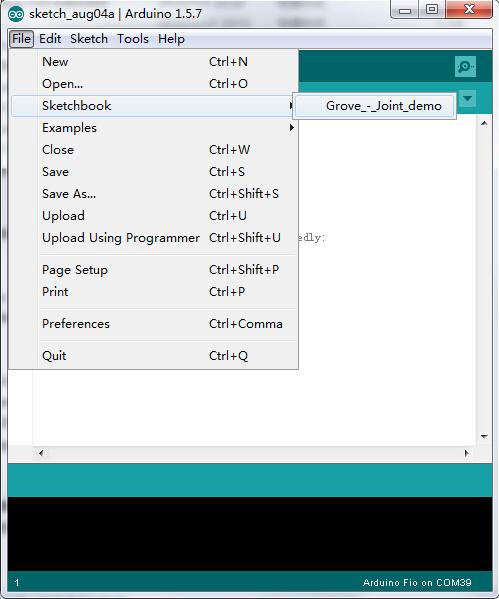
After configurations, please restart Arduino, click File>Sketchbook and choose Grove- Joint demo after which testing code will show up.
Click Tools>Board to choose Arduino Fio and select respective serial port.
Now click Upload(CTRL+U) to burn testing code. Please refer to here for any error prompt and you can also add comment on forum
Review Results
After upload completed, you can rotate the angle sensor then you'll find the RBG LED is lighted one by one.
Get Voltage of Battery
The Battery+ is connected to A2. You can read this pin to get the voltage of battery.
Upload the below code to get voltage of the battery.
Note that when you insert Grove Joint to a PC, the battery was charged, so maybe the voltage you read is not right.
Resources
Last updated