Learn, Make and Invent
  • Educational STEM Products
  • Early Primary
    • Bee Bot
    • Ozobot
    • Matatalab Coding Set
    • Neuron coding blocks
    • Osmo ios
    • Cubetto
    • Sphero Bolt
  • Primary
    • Codey Rocky AI Robot
      • Tutorials
        • Introduction
        • Get Started
        • Upload Mode
        • Emotion Blocks
        • IoT Blocks
        • Neuron Blocks
        • IR Remote
        • Use Python
      • Examples
      • Block Reference
        • Looks
        • Lighting
        • Speaker
        • Action
        • Sensing
        • Infrared
        • Events
        • Control
        • Operators
      • Python API Reference
        • Python API for Codey
        • Python API for Rocky
        • Python API for Third-Party Libraries
        • Python API for Neuron Extension Modules
      • FAQs
    • Edison
    • mBot
      • Introduction
      • Building mBot
      • Connect mBot
      • Preset Modes
    • Microbit
    • Merge Cube
    • Bare Conductive Board
    • Tello Edu
  • Secondary
    • Microbit Grove Inventor Kit
    • mBot Ranger
    • Arduino Science Kit
    • Arduino Starter Kit
    • Arduino Grove Starter Kit
    • CoDrone
  • Senior Secondary
    • CoDrone Pro
    • Arduino CTC Go
  • Digital Tech Kits
    • Digital Tech Kit for K-2
    • Digital Tech Kit for 3-5
    • Digital Tech Kit for 6-8
    • Digital Tech Kit for 9-10
  • Makerspace
    • Otto DIY
      • User guide
      • Assembly Instructions
        • Builder Kit
        • Builder Kit +
        • Builder Kit Humanoid
        • Builder Kit E
      • OTTO enclosures 3D and laser cut files
      • Code
    • Curcuitmess
      • Circuitmess Ringo
        • Inside the Box
        • Tools Needed
        • Soldering the parts
        • Assembling the parts
        • Set up your Ringo
  • Grove Ecosystem
    • Grove System
    • Grove Modules
      • Actuators
        • Atom Node
        • Grove 2 Coil Latching Relay
        • Grove Button
        • Grove Buzzer
        • Grove Dry Reed Relay
        • Grove EL Driver
        • Grove Haptic Motor
        • Grove I2C Motor Driver V1.2
        • Grove I2C Motor Driver V1.3
        • Grove I2C Motor Driver
        • Grove LED Matrix Driver v1.0
        • Grove Mini Fan
        • Grove Mini I2C Motor Driver v1.0
        • Grove MP3 v2.0
        • Grove Recorder v3.0
        • Grove Relay
        • Grove Serial MP3 Player
        • Grove Servo
        • Grove Solid State Relay
        • Grove Speaker
        • Grove Variable Color LED
        • Grove Vibration Motor
        • Grove Water Atomization
      • Display
        • Grove 4 Digit Display
        • Grove Circular LED
        • Grove LCD RGB Backlight
        • Grove LED Bar
        • Grove LED Socket Kit
        • Grove LED String Light
        • Grove LED Strip Driver
        • Grove OLED Display 0.96inch
        • Grove OLED Display 1.12inch
        • Grove Red LED
        • I2C LCD
      • Sensors
        • Grove 3 Axis Analog Accelerometer
        • Grove 3 Axis Compass V1.0
        • Grove 3 Axis Digital Accelerometer 1.5g
        • Grove 3 Axis Digital Accelerometer 16g
        • Grove 3 Axis Digital Accelerometer 400g
        • Grove 3 Axis Digital Gyro
        • Grove 6 Axis Accelerometer And Compass V2.0
        • Grove 6 Axis Accelerometer And Gyroscope
        • Grove 80cm Infrared Proximity Sensor
        • Grove Air Quality Sensor v1.3
        • Grove Alcohol Sensor
        • Grove Barometer Sensor BME280
        • Grove Barometer Sensor BMP180
        • Grove Barometer Sensor BMP280
        • Grove Barometer Sensor
        • Grove Barometer High Accuracy
        • Grove Chest Strap Heart Rate Sensor
        • Grove CO2 Sensor
        • Grove Collision Sensor
        • Grove Digital Infrared Temperature Sensor
        • Grove Digital Light Sensor
        • Grove Dust Sensor
        • Grove Ear clip Heart Rate Sensor
        • Grove Electricity Sensor
        • Grove Finger clip Heart Rate Sensor with shell
        • Grove Finger clip Heart Rate Sensor
        • Grove Fingerprint Sensor
        • Grove Gas Sensor O2
        • Grove Gas Sensor
        • Grove HCHO Sensor
        • Grove High Temperature Sensor
        • Grove IMU 10DOF v2.0
        • Grove Infrared Receiver
        • Grove Line Finder
        • Grove Temperature and Humidity Sensor Pro
        • Grove Temperature And Humidity Sensor
        • Grove Voltage Divider
        • Grove Water Sensor
        • Grove XBee Carrier
      • Communication
        • Grove High Precision RTC
        • Grove LoRa Radio
        • Grove NFC Tag
        • Grove NFC
        • Grove 125KHz RFID Reader
        • Grove 315MHz RF Kit
        • Grove 433MHz Simple RF Link Kit
        • Grove Bee Socket
        • Grove BLE v1
        • Grove BLE dual model v1.0
        • Grove DMX512
        • Grove GPS
        • Grove I2C ADC
        • Grove I2C FM Receiver
        • Grove Protoshield
        • Grove RJ45 Adapter
        • Grove Screw Terminal
        • Grove Serial Bluetooth v3.0
        • Grove Serial RF Pro
        • Grove UART Wifi
      • Others
        • Grove Base Booster Pack
        • Grove Base Cape for BeagleBone v2
        • Grove Base HAT
        • Grove Base Shield for NodeMCU V1.0
        • Grove Base Shield for Photon
        • Grove Breakout for LinkIt Smart 7688 Duo
        • Grove Cape for BeagleBone Series
        • Grove Indoor Environment Kit for Edison
        • Grove Inventor Kit for microbit
        • Grove IoT Developer Kit Microsoft Azure Edition
        • Grove IoT Starter Kits Powered by AWS
        • Grove Recorder
        • Grove Shield for Intel Joule
        • Grove Smart Plant Care Kit
        • Grove Speech Recognizer Kit for Arduino
        • Grove Starter Kit for BeagleBone Green
        • Grove Starter Kit for IoT based on Raspberry Pi
        • Grove Starter kit for LinkIt Smart7688 Duo
        • Grove Starter Kit v3
        • Grove AND
        • Grove Base Shield for IOIO OTG
        • Grove BlinkM
        • Grove DC Jack Power
        • Grove Differential Amplifier v1.0
        • Grove Differential Amplifier v1.2
        • Grove GSR Sensor
        • Grove I2C Hub
        • Grove Joint v2.0
        • Grove Mega Shield
        • Grove Mini Camera
        • Grove Mixer Pack V2
        • Grove MOSFET
        • Grove Node
        • Grove NOT
        • Grove NunChuck
        • Grove OR
        • Grove PS 2 Adapter
        • Grove Recorder v2.0
        • Grove Serial Bluetooth
        • Grove Serial LCD V1.0
        • Grove Single Axis Analog Gyro
        • Grove SPDT Relay 30A
        • Grove Starter Kit for LinkIt ONE
        • Grove Starter Kit for mbed
        • Grove Toy Kit
        • Grove Wrapper
        • GrovePi Plus
  • Arduino
    • Graphical coding with Grove sensors
    • Arduino Comparison Sheet
    • Tutorials
      • Setup Arduino Every board in Arduino IDE
      • Arduino Cloud
      • Installing Libraries
      • Motor, Servo for Arduino
      • Sensor for Arduino
    • Examples
      • Genuino 101
        • Prerequisites
        • Shock / Tap Detection
        • LED Control Over Bluetooth
        • Board Orientation Detection
        • Pedometer – Step Counting Over Bluetooth
        • Timer Switch
        • Appendices
          • Appendix A
          • Appendix B
  • micro:bit
    • Examples
      • Servo with micro:bit
  • Halocode
    • Introduction
    • Get Started
    • Upload Mode
    • Speech Recognition
    • User Cloud Message
    • Use Python with HaloCode
    • Code with Mu A Simple Python Editor
      • Examples
        • Basic Project
          • Color Mixer
          • Compare Strength
          • Connect Wi-Fi
          • Control Multiple HaloCodes via LAN
          • Energy Ring
          • Make a Smiling Face with the LED Ring
          • Make a Volume Detector
          • Press the Button to play LED Animation Meteor
          • Rainbow Button
        • Level Up
          • Control HaloCode's LEDs via Voice Command
          • Remote Control
          • Make HaloCode the Steering Wheel of the Car on Stage
          • HaloCode's Remote Control Deck
          • Emotion Detector
          • Deep Learning and Facial Recognition
          • Use Global Variable to Interact with Sprites
        • Workshop
          • A Kitten with Blinking Eyes and a Waving Tail
          • Pedometer
          • Smart Home
  • Troubleshooting
    • Matatalab
      • Matatalab Upgrade
        • Pre Upgrade Instructions - MatataBot
        • MatataBot Upgrade
        • Matata Tower Upgrade
        • Resources for Upgrade
      • Matatalab Pairing
Powered by GitBook
On this page
  • Features
  • Specifications
  • Platforms Supported
  • Hardware Overview
  • Getting Started
  • With Arduino
  • With Beaglebone Green
  • Reference
  • I2C Address Setting
  • How much does the I2C ADC increase the accuracy?
  • Resources

Was this helpful?

  1. Grove Ecosystem
  2. Grove Modules
  3. Communication

Grove I2C ADC

PreviousGrove GPSNextGrove I2C FM Receiver

Last updated 5 years ago

Was this helpful?

Grove - I2C ADC is a 12-bit precision ADC module based on ADC121C021. It helps you increase the accuracy of value collected from analog sensor by providing a constant reference voltage. Because its address is changeable, you can use up to 9 I2C ADC at the same time at most. At the other hand, this module provides auto sleep function which lowers the power consumption considerably.

Features

  • Low power consumption

  • High precision

  • Automatic power-down mode

  • Address changeable

Specifications

Item

Typical

Unit

Working Voltage

5.0

VDC

Resolution

12

Bit

Sample Rate

188.9

ksps

Dimension

40X20

mm

Platforms Supported

Hardware Overview

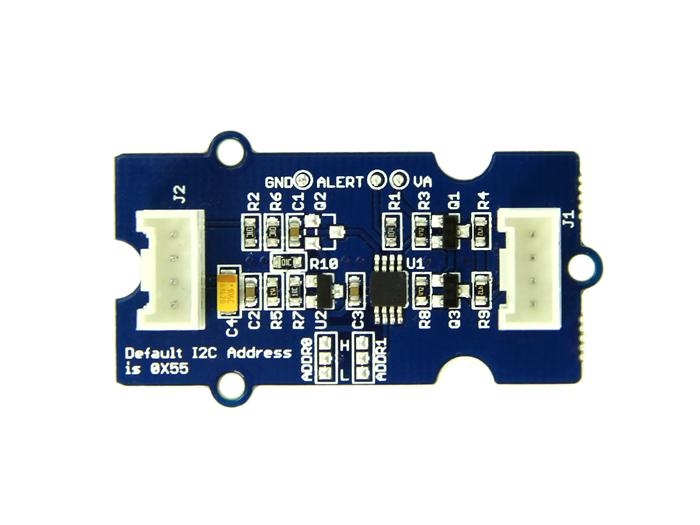
J2: used to connect analog sensor as Grove - I2C ADC input interface.

U1: ADC121C021 IC,12-Bit Analog-to-Digital Converter

The black line area is used to set the IIC address. ADDR0 and ADDR1 are shipped connected to L. You can change them to "H" or floating by a little modification on the board(floating is neither connecting "H" nor connecting "L"). Find details in the Reference.

Getting Started

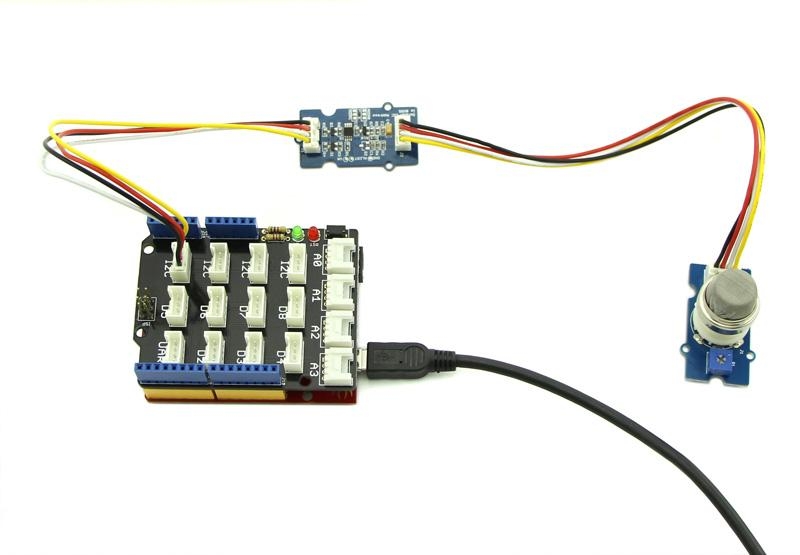
Grove - I2C ADC has two interfaces: input socket(J2) and output socket(J1). Connect an analog sensor to its input socket and connect the I2C ADC to Arduino/Seeeduino also via Grove cables.

Take Grove - Gas Sensor as an example, and now we learn how to read sensor data using Grove - I2C ADC. The hardware installation should be like this:
Now you can read the gas sensor value using the code below.

#include <Wire.h>

#define ADDR_ADC121             0x55

#define V_REF 3.00

#define REG_ADDR_RESULT         0x00
#define REG_ADDR_ALERT          0x01
#define REG_ADDR_CONFIG         0x02
#define REG_ADDR_LIMITL         0x03
#define REG_ADDR_LIMITH         0x04
#define REG_ADDR_HYST           0x05
#define REG_ADDR_CONVL          0x06
#define REG_ADDR_CONVH          0x07

unsigned int getData;
float analogVal=0;         // convert
void init_adc()
{
  Wire.beginTransmission(ADDR_ADC121);        // transmit to device
  Wire.write(REG_ADDR_CONFIG);                // Configuration Register
  Wire.write(0x20);
  Wire.endTransmission();  
}

void read_adc()     //unsigned int *data
{


    Wire.beginTransmission(ADDR_ADC121);        // transmit to device
    Wire.write(REG_ADDR_RESULT);                // get result
    Wire.endTransmission();

    Wire.requestFrom(ADDR_ADC121, 2);           // request 2byte from device
    delay(1);
    if(Wire.available()<=2)
    {
      getData = (Wire.read()&0x0f)<<8;
      getData |= Wire.read();
    }
    Serial.print("getData:");
    Serial.println(getData);
    delay(5);
    Serial.print("The analog value is:");
    Serial.print(getData*V_REF*2/4096); 
    Serial.println("V");
}
void setup()
{
  Serial.begin(9600);
  Wire.begin();
  init_adc();
}

void loop()
{  read_adc();//adcRead);
   delay(50);
}

In the code above, we defined the Vref as 3.0V which is decided by the I2C ADC module. This reference voltage is more accurate than one generated by microcontroller. And you can make that more accurate by measuring the voltage between VA and GND and use that value to replace 3.00 in the code above.

Now you can upload the code.

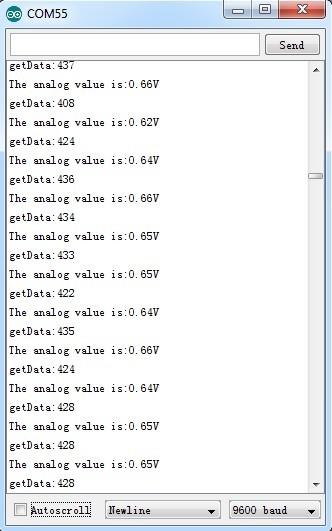
Afterwards, open the serial monitor and read the values:
With Beaglebone Green

To begin editing programs that live on BBG, you can use the Cloud9 IDE. As a simple exercise to become familiar with Cloud9 IDE, creating a simple application to blink one of the 4 user programmable LEDs on the BeagleBone is a good start.

Step2: Click the "+" in the top-right to create a new file.

Step3: Copy and paste the following code into the new tab

from Adafruit_I2C import Adafruit_I2C
import time

ADDR_ADC121 = 0x50

REG_ADDR_RESULT = 0x00
REG_ADDR_ALERT = 0x01
REG_ADDR_CONFIG = 0x02
REG_ADDR_LIMITL = 0x03
REG_ADDR_LIMITH = 0x04
REG_ADDR_HYST = 0x05
REG_ADDR_CONVL = 0x06
REG_ADDR_CONVH = 0x07

i2c = Adafruit_I2C(ADDR_ADC121)           

class I2cAdc:
    def __init__(self):
        i2c.write8(REG_ADDR_CONFIG, 0x20)

    def read_adc(self):
        "Read ADC data 0-4095."
        data_list = i2c.readList(REG_ADDR_RESULT, 2)
        #print 'data list', data_list
        data = ((data_list[0] & 0x0f) << 8 | data_list[1]) & 0xfff
        return data

if __name__ == '__main__':
    # Connect the Grove - I2C ADC to I2C Grove port of Beaglebone Green.
    adc = I2cAdc()
    while True:
        print 'sensor value ', adc.read_adc()
        time.sleep(.2)

Step4: Save the file by clicking the disk icon and giving the file a name with the .py extension.

Step5: Connect Grove I2C ADC to Grove I2C socket on BBG.

Step6: Run the code. You'll find that the terminal outputs AD value every 2 seconds.

Reference

I2C Address Setting

The ADC I2C has a seven-bit hardware address which is decided by ADR0 and ADR1. ADR0 and ADR1 are connected to L inside the board as default. But you can change it. For example, use a knife to cut off the connection between L and ADR0(as the picture shown below), then you make the state of ADR0 into Floating(connected to nothing). And if you solder up ADR0 and H this time, then you make the value of ADR0 H.
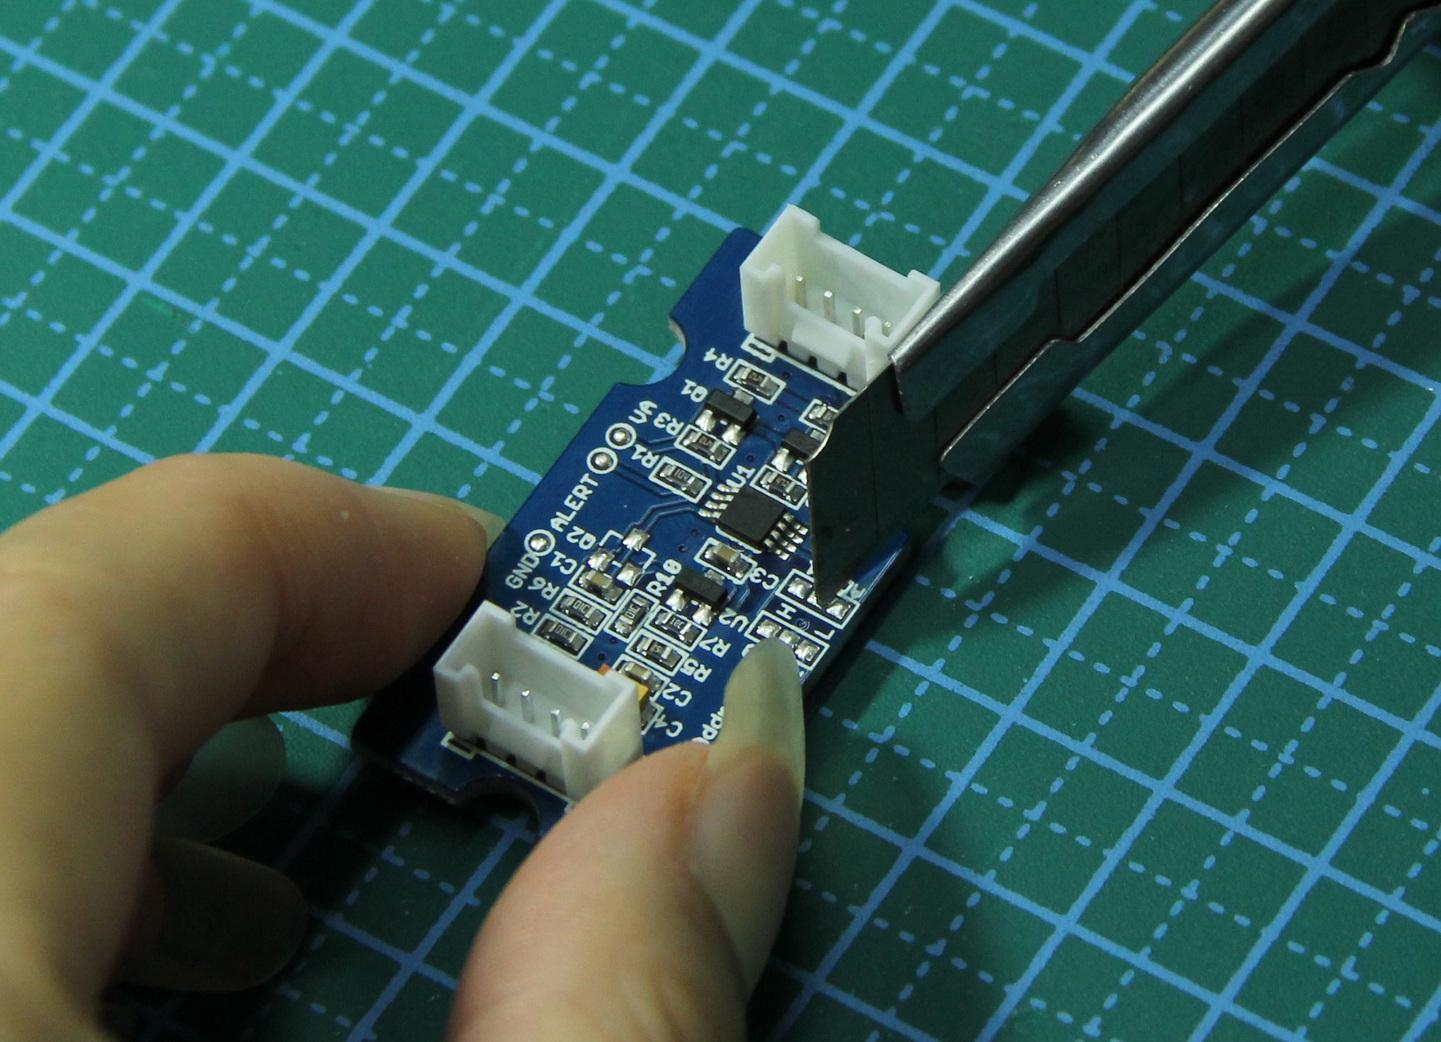
You can find the relationship of hardware I2C address and the values of ADR0 and ADR1 in the following table.

Slave Address[A6 - A0]

ADR0 and ADR1 inputs state

ADR1

ADR0

1010000(0x50)

Floating

Floating

1010001(0x51)

Floating

L

1010010(0x52)

Floating

H

1010100(0x54)

L

Floating

1010101(default 0x55)

L

L

1010110(0x56)

L

H

1011000(0x58)

H

Floating

1011001(0x59)

H

L

1011010(0x5A)

H

H

How much does the I2C ADC increase the accuracy?

Here is an experiment we make to give you a sense about how much the I2C ADC increase the accuracy of an analog sensor. First, let's check the values collected directly through analog port on Arduino/Seeeduino from an Grove - Gas Sensor(MQ5)
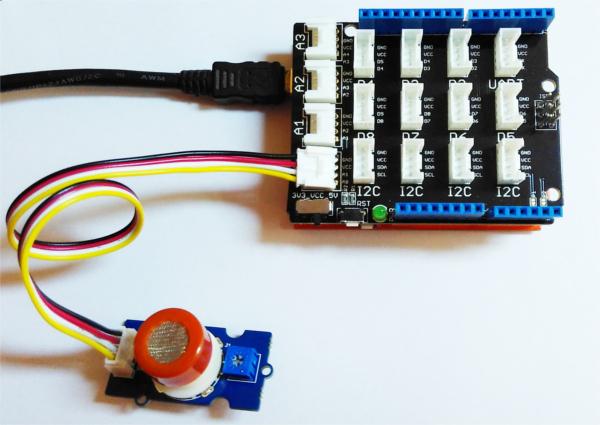
We upload the code below to get the data.

    /*
     * Grove - Gas Sensor(MQ5)  
     *
     * The Gas Sensor detect the related Gas density, 
     * Arduino get the result by analogread. the gas Density is 
     * 0~1, larger the output is, the denser the gas.
     * Connect the Sensor to A0 in this demo;
     * 
     *  By: http://www.seeedstudio.com
    */
    #define Vref 4.95
    void setup() {
      Serial.begin(9600);
    }

    void loop() {
      float vol;
      int sensorValue = analogRead(A0);
      vol=(float)sensorValue/1023*Vref;
      Serial.print("The sensorValue is ");
      Serial.println(sensorValue);
      Serial.print("The analog value is ");
      Serial.print(vol);
      Serial.println("V");
      delay(100);
    }

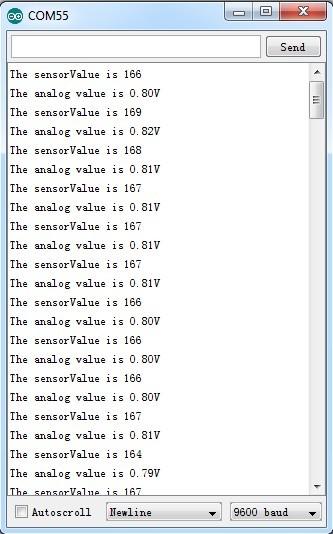
The result is:

As default, Vref is generated by Arduino which is theoretically 5V. But actually that is a value afloat which results the deviation of the final data. This kind of inaccuracy is avoided when using Grove - I2C ADC, because it provides a strict 3.0V as Vref. To contrast, in the same condition, sensor values collected by the circuit with Grove - I2C ADC in the scope is shown below:

In order to find out which result is more close to the actual condition, here we use a multimeter to measure the voltage between the pin SIG and pin GND of the sensor.

Resources

!!!Tip More details about Grove modules please refer to

J1: used to connect Arduino IIC Interface as Grove - I2C ADC output interface.

With

Note The address of Grove - I2C ADC is changeable which means you can redefine its address. That requires some hardware modification on the board. If you are thinking about using more than one I2C ADCs at the same time, follow the instructions in the Reference part below to do so. The maximum number of I2C ADCs that can be used simultaneously is 9, but there are only 4 I2C sockets on , so if you want to use more than 4 I2C ADC, take a to create more I2C sockets. </div>

If this is your first time to use Cloud9 IDE, please follow this .

Step1: Set the Grove - UART socket as a Grove - GPIO Socket, just follow this .

Grove System
Arduino
Grove - Base Shield V1.2
Grove - I2C Hub
link
link
I2C ADC Eagle File
ADC121C021 Datasheet