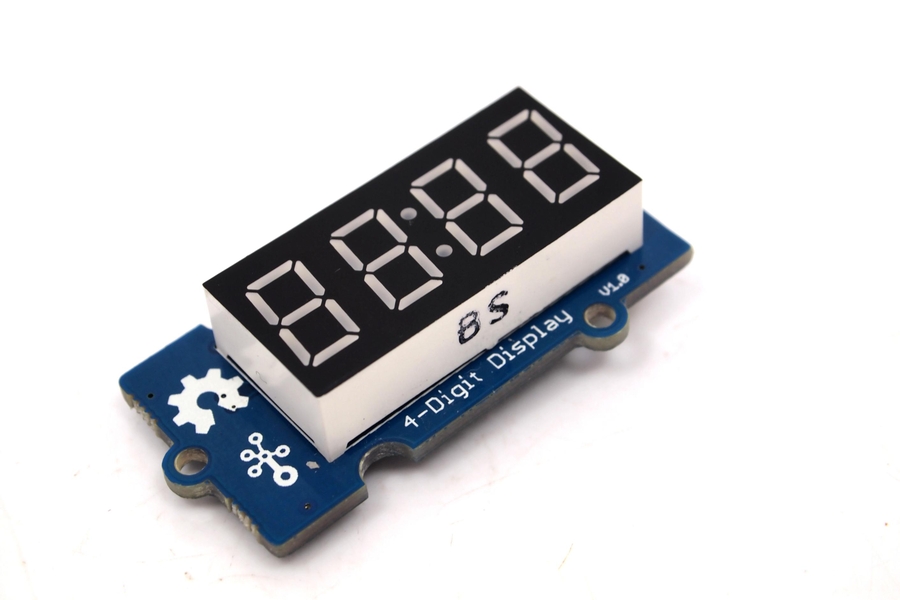
Grove 4 Digit Display
Grove - 4-Digit Display module is a 12-pin module. In this module, we utilise a TM1637 to scale down the number of controlling pins to 2. That is to say, it controls both the content and the luminance via only 2 digital pins of Arduino or Seeeduino. For projects that require alpha-numeric display, this can be a nice choice.
Features
4 digit red alpha-numeric display
Grove compatible interface (3.3V/5V)
8 adjustable luminance levels
Application Ideas
Time display
Stopwatch
Sensors' input display
Specifications
Item
Min
Typical
Max
Unit
Voltage
3.3
5.0
5.5
VDC
Current
0.2
27
80
mA
Dimensions
42x24x14
mm
Net Weight
7±1
g
Platforms Supported
Hardware Overview
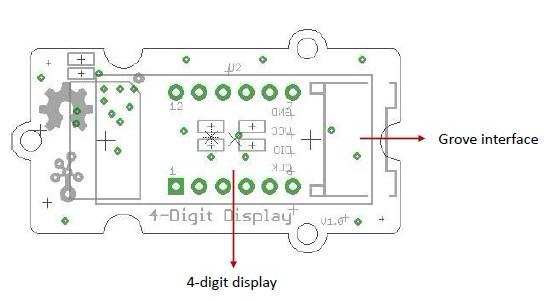
Grove interface - Can be connected to digital port on Grove - Base Shield.
4 - digit display - Common anode digital tube.
Pin definition: CLK DIO VCC GND
Getting Started
With TI LaunchPad
Displaying the Numbers (4-Digital-Display)
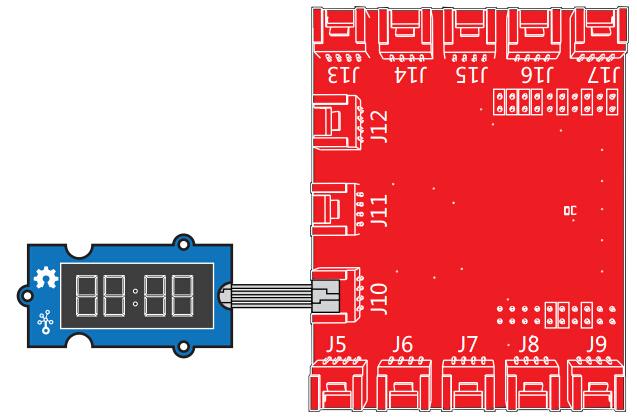
This example demonstrates how to display some digital numbers using a Grove-4-Digital Display.
With Arduino
The module uses an LED drive chip - TM1637 to control the contents and change the luminance. Here we drive it to display time.
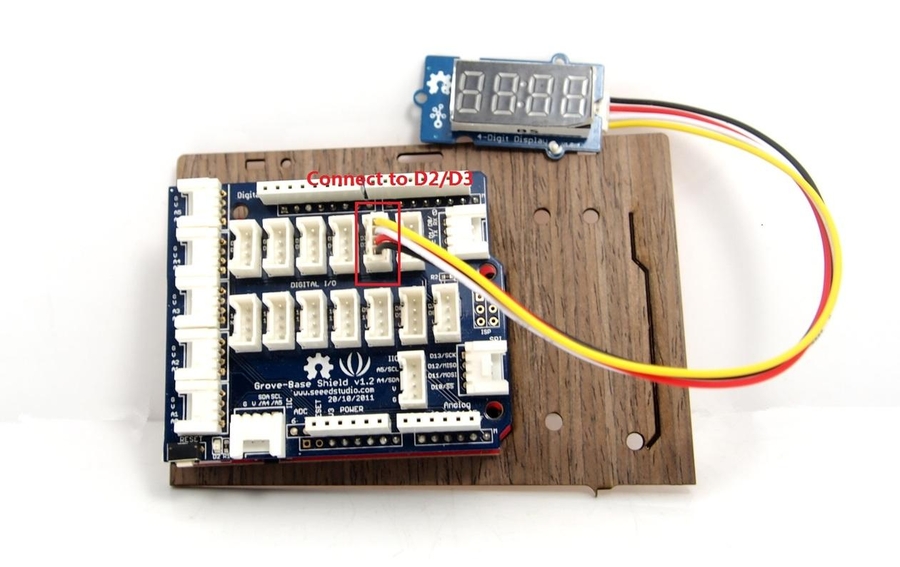
Connect the Grove socket marked "IN" on the LED Strip Driver and digital port 2 of the Grove - Base Shield with a Grove cable. You can change to the digital port as you like. But don't forget to change the port number in the definition of the demo code at the same time.
Plug onto Arduino/Seeeduino or plug Grove - Mega Shield onto Arduino Mega.
Seeeduino and Grove - 4-digit display:
Arduino Mega and Grove - 4-digit display:
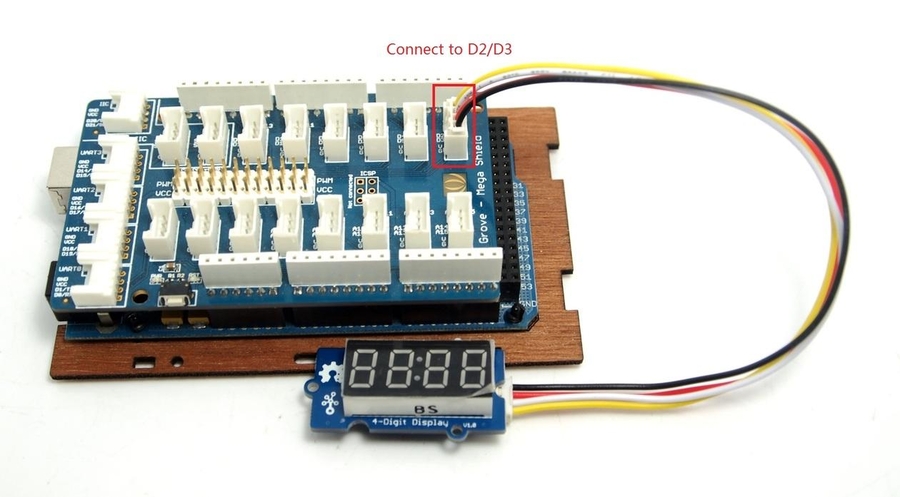
Connect Arduino/Seeeduino to PC via a USB cable.
Download the 4-Digit Display library and TimerOne library. Unzip and put them in the libraries file of Arduino IDE by the path: ..\arduino-1.0\libraries.
Restart the Arduino IDE, open one demo code you like, for example ClockDisplay directly by the path:File -> Example ->DigitalTube->ClockDisplay.
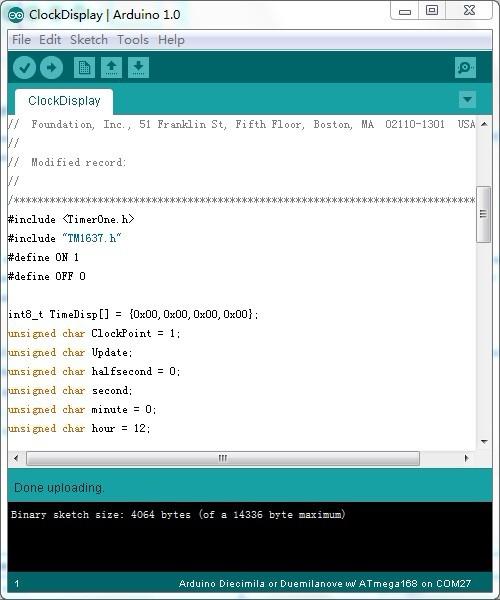
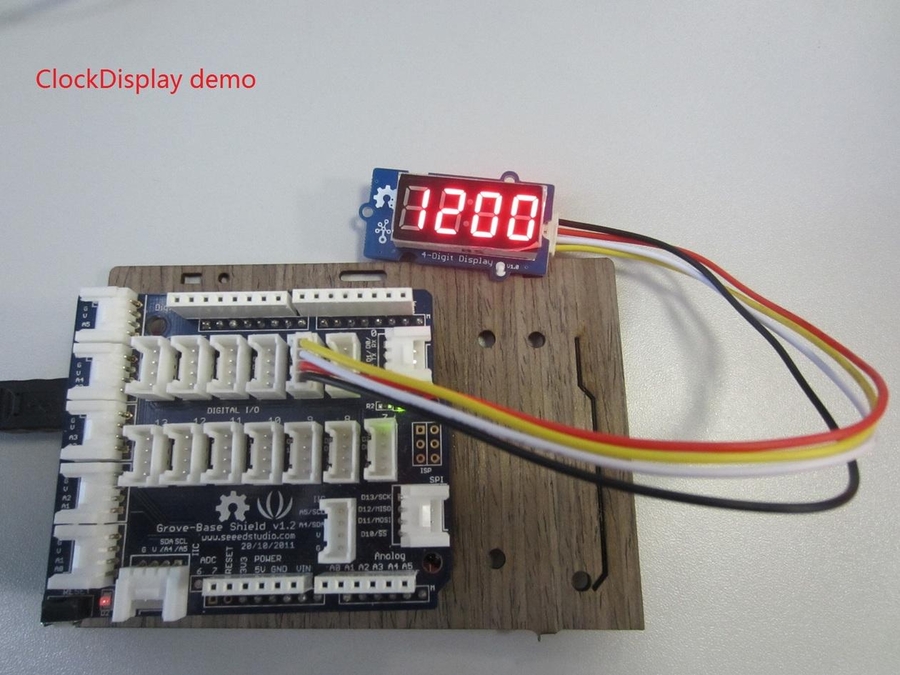
Upload the demo code and the clock will be ticking in a few seconds.
You can see this:
With Raspberry Pi
1.You should have got a raspberry pi and a grovepi or grovepi+.
2.You should have completed configuring the development enviroment, otherwise follow here.
3.Connection
Plug the sensor to grovepi socket D5 by using a grove cable.
4.Navigate to the demos' directory:
To see the code
5.Run the demo.
6.This demo may not work if your grovepi doesn't have the newest firmware, update the firmware.
Project
Inspired by OVERWATCH, we have made a very cool Wooden Laser Gun toy for fun these day!
The Wooden Laser Gun and the Gun Target are all based on an Arduino board called Seeeduino Lotus. The laser emitter on the Laser Gun is controlled to fire laser pulse to "activate" the Gun Target. And there are 3 light sensors on the Gun Target to detect the laser pulse. It seems very simple right? If you are interested in our project, please make one for yourself or your child! It's worth to spend one day DIY it as a Xmas present.
Resources
Last updated
