Atom Node
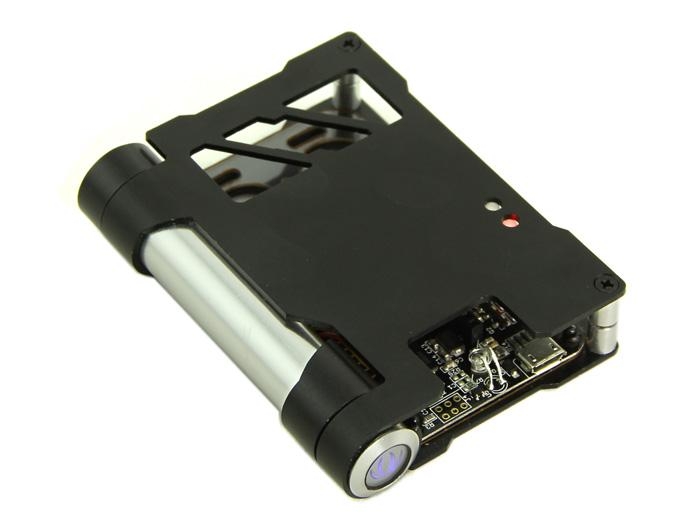
You might want to DIY an alarm system to monitor the soil moisture in your garden. While you are still lying in bed comfortably in the early morning, you might need a device, which automatically opens the doghouse for your doggie to come out and enjoy the warm sunlight. However, the complex software and hardware holds you back. Now, here comes Atom sweeping the road through the thistles and thorns; helping you complete these wonderful homebrew projects.
Atom is a node in internet of things. It can not only work standalone but also coordinate with other devices. Atom is highly expandable and easy to use. Standard Grove interfaces allow connections with different sensors. Atom fulfills tasks intelligently: the abundant data gathered are transmitted to the actuator wirelessly. What’s more fascinating is that you can finish all the tasks by simply setting your Android phone.
Atom features wireless data transmission and mobile monitoring. Equipped with standard Bee interface, Atoms can be connected to XBee, RFBee and Bluetooth Bee to form wireless communication network, which gathers and manages the data automatically. Atom can also upload the data of different sensors to the Cloud, making it convenient to analyze data at all times and places simply through Web browsers.
Feature
Mobile devices/Apps centered configure
Open Source
Flexible wireless networks topology from Ad-hoc to mesh
Built-in battery
A variety of Indicators, Easy to distinguish the work state
Skin-Skeleton-Gut philosophy
Specification
Item
Typical
Unit
USB Supply Voltage
4.75-5.25
VDC
Quiescent Current(connect RF Bee)
25~40
mA
GPIO Voltage
3.3
V
Battery Capacity
300
mAH
Charging Current
300-500
mA
USB Interface
MICRO USB
/
Working Frequency
16
MHz
Grove Supply Voltage
3.3
V
Output Current(Max)
500
mA
Continuous Working Time(Max)
22
h
Photosensitive Sensor Response Frequency
100
Hz
Low Battery Indication
3.71
V
Photosensitive sensor response frequency
100
Hz
RF BEE (seeed) Communication Distance(Max) in outdoor
200
m
Xbee(Xbee) Communication Distance(Max) in outdoor
30
m
Bluetooth Bee(seeed) Communication Distance(Max) in outdoor
20
m
Grove Connector
3(IIC;UART;PWM)
/
20Pin Bee Socket
Compatible Rfbee,Xbee,Bluetooth Bee
/
Two-color charge indicator
Green/Red
/
Two-color user indicator
Green/Red
/
Buzzer Frequency
2.7±0.3
K
Topology
Atom Node has sensor/actuator connectors for playing solo. With XBee or other open RF communication modules, It is also ready to talk in versatile networks topology when used in multiple. For example:
1. The first Mode:
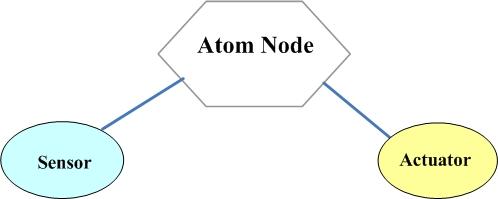
In this mode, The sensor and actuator are connected to one Atom Node. Atom Node read the sensor data and determine whether drive the Actuator to execute related actions. Demo 1 in the usage is working in this mode.
2. The second Mode:

In this mode, The sensor and actuator are connected to two Atom Node. Atom Node receive the sensor data which is send by another Atom Node through RFBee and determine whether drive own actuator to execute related actions. Demo 2 in the usage is working in this mode.
3. The third Mode:
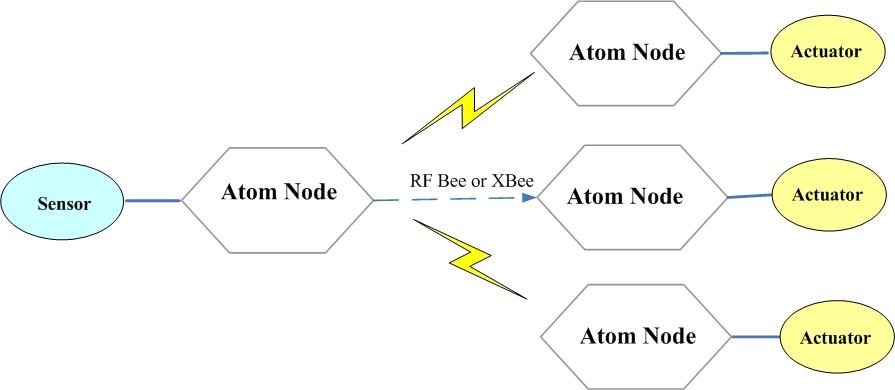
In this mode, The sensor is connected to one Atom Node(here we called it as AtomSensor). Other Atom Nodes receive the sensor data which is send by AtomSensor through RFBee and determine whether driver own actuator to execute related actions.
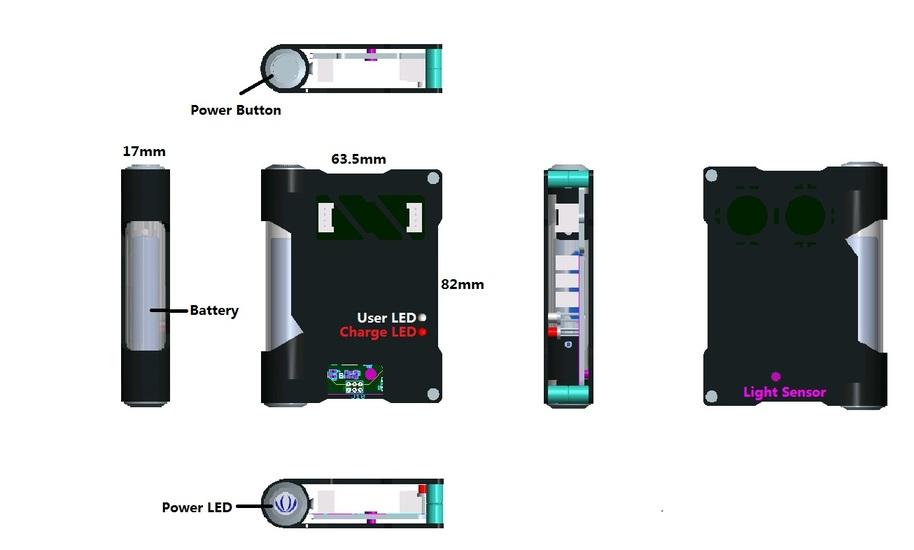
The Structure
Node solutions are design align with SSG (skin skeleton gut) philosophy. Gut: electronics inside
Skeleton: An minimal aluminum framework for protection and fixture, leaving enough opening to cater various sensors/actuators
Product Size:82mm63.5mm17mm
Material:Aluminum 5052
Finished: Black/Silver Anodized
Highlight Features: Hinge structure
Part Cleanness: Remove all burrs&sharp corners. Clean off all oils,Dirt,or other contaminants
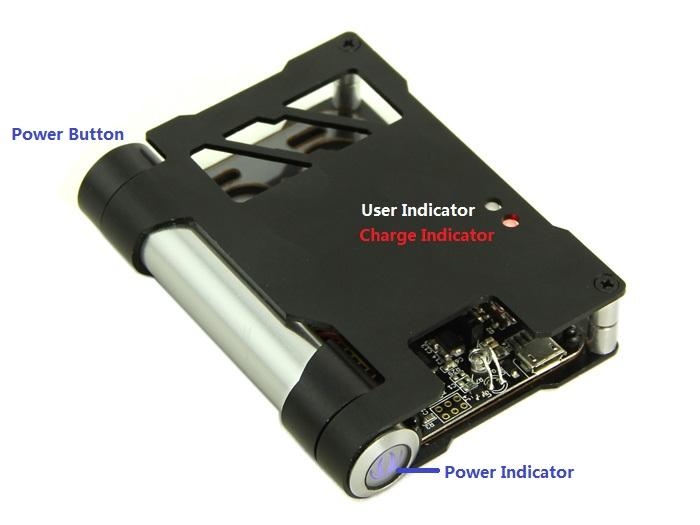
Let's look forward to these prototype...
The Hardware
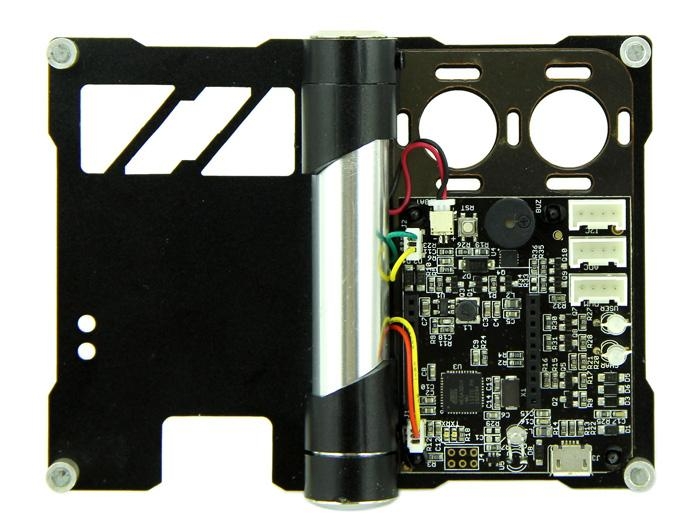
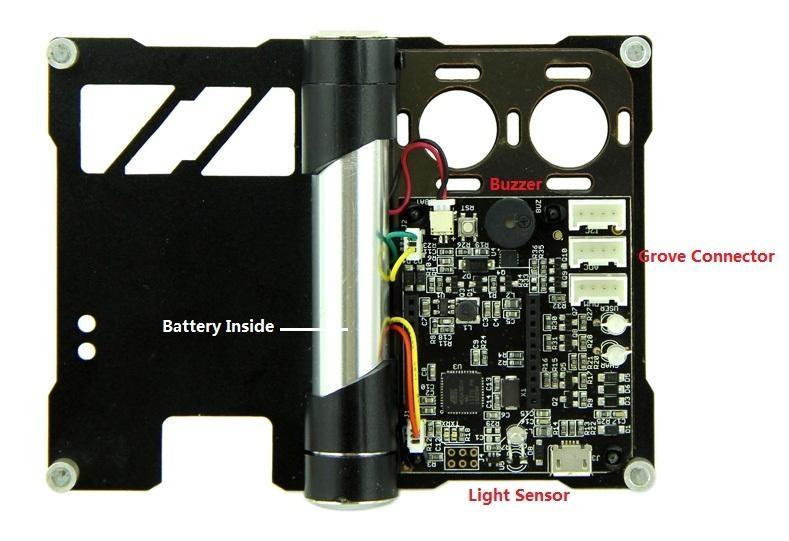
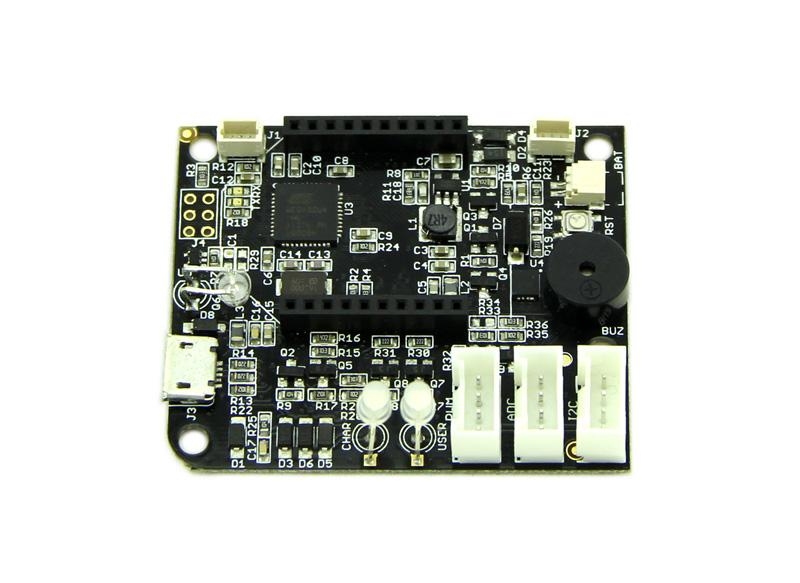
The system adopts Atmel 32U4 as the main chip. And equipped with standard Bee interface socket for wireless communication. It adopts 3.3V power supply, and the external power interface is Micro USB. When connected with external power source, it will convert to 3.3V through DC‐DC voltage‐adjustable‐circuit(based on chip TD6810),and supply power for the whole system. Meanwhile, 5V power source charge Lithium battery through CN3065 charge manager IC.
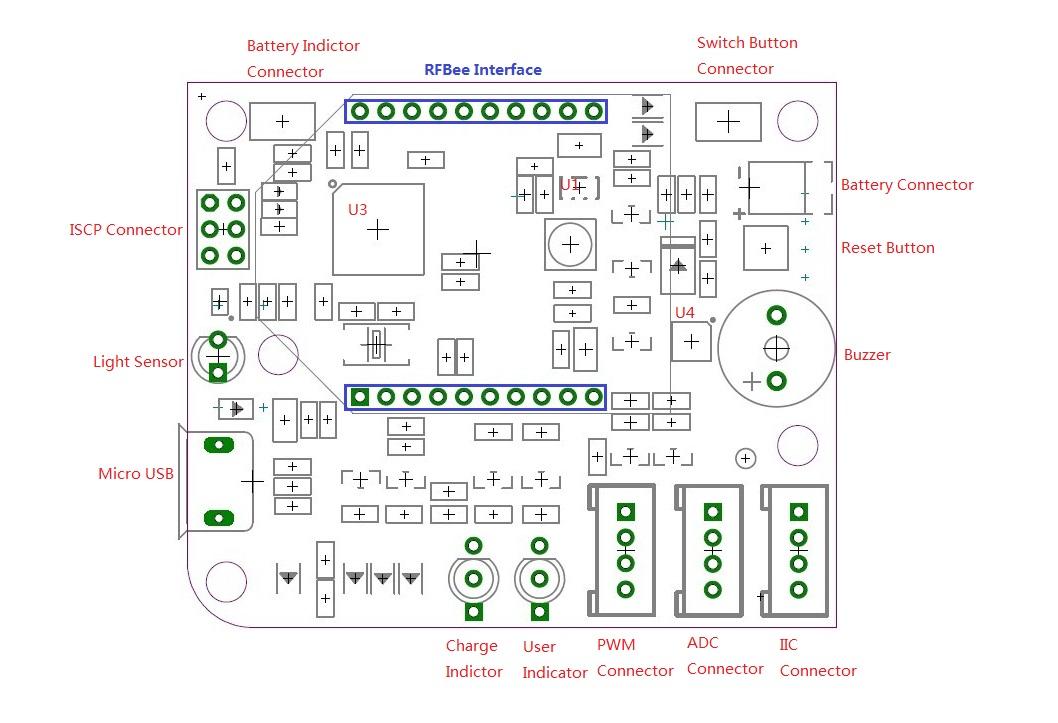
U1: Atmel 32U4 IC, a 8-bit AVR Microcontroller;
U3: TD6810-ADJ IC, 1.5MHz 800mA Synchronous Step-Down Regulator Dropout;
U4: CN3065 IC, Charge management chip.
Micro USB: Charge for Lithium Battery and programming.
Charge Indicator: During charging process, the indicator is red; when finish charging, it turns to green. When it’s not connected to external power source or when the battery is in normal state, the indicator won’t light up. When it’s in low‐battery level(do not connect to extern power), it shows red.
User Indicator: Green blinking indicates transmit data, Red blinking indicates initializate. Red light indicates in configuration mode.
Light Sensor: Receive encoded parameters that Android device send.
ADC Connector: Can connect Sensors(is not IIC connector).
PWM Connector: Can connect Actuators(is not IIC connector).
IIC Connector: Can connect Sensors or Actuators(is IIC connector).
Note: A atom node can not connect simultaneously two or more Sensors(Actuators).
Key Feature
Arduino compatible MCU
LiPo battery and charger circuit
LED/LDR for parameter setup
Sensor/Actuator connector
XBee compatible socket
Micro USB cable for programming and power
Low consumption design
Block Diagram
Hardware design instruction
http://www.seeedstudio.com/wiki/images/1/1b/BeaconAtom_Hardware_Design_Analysis.pdf
Atom Node Overview
Now let’s see what Atom Node looks like.
The firmware and software
The firmware
The firmware which have uploaded to Atom Node can driving sensors and actuators. Sensors available for Atom Node:
ID
Name
Type
Control Mode
1
Grove - Button
Sensor
IO
2
Grove - Tilt Switch
Sensor
IO
3
Grove - Line Finder
Sensor
IO
4
Grove - PIR Motion Sensor
Sensor
IO
5
Grove - Infrared Reflective Sensor
Sensor
IO
6
Grove - Magnetic switch
Sensor
IO
7
Grove - Touch Sensor
Sensor
IO
8
Grove - IR Distance Interrupter
Sensor
IO
9
Grove - Hall Sensor
Sensor
IO
11
Grove - Collision Sensor
Sensor
IO
12
Grove - Moisture sensor
Sensor
Analog
13
Grove - Light Sensor
Sensor
Analog
14
Grove - Rotary Angle Sensor
Sensor
Analog
44
Grove - Temprature Sensor
Sensor
Analog
45
Grove - Water Sensor
Sensor
Analog
46
Grove - 80cm Infrared Proximity Sensor
Sensor
Analog
47
Grove - Infrared Temperature Sensor
Sensor
Analog
48
Grove - Slide Potentiometer
Sensor
Analog
59
Grove - Air quality sensor 1.0
Sensor
Analog
50
Grove - Electricity Sensor
Sensor
Analog
51
Grove - Alcohol Sensor
Sensor
Analog
53
Grove - Sound Sensor
Sensor
IO
54
Grove – Ultrasonic Ranger
Sensor
IO
81
Grove - Digital Light Sensor
Sensor
IIC
82
Grove - Barometer Sensor
Sensor
IIC
102
Grove - Temperature&Humidity Sensor Pro –T
Sensor
ONE-Wire
103
Grove - Temperature&Humidity Sensor Pro –H
Sensor
ONE-Wire
110
Grove - Infrared Receiver
Sensor
IR
Current it can drive almost all of sensors. It is visible that the firmware is powerful. Actuators available for Atom Node:
ID
Name
Type
Control Mode
128
Grove - Relay
Actuator
IO
129
Grove - LED
Actuator
IO
135
Grove - Multi Color Flash LED (5mm)
Actuator
IO
136
Grove - Variable Color LED
Actuator
IO
137
Grove - Buzzer
Actuator
IO
138
Grove - Vibrator
Actuator
IO
201
Grove - OLED Display 128*64
Actuator
IIC
202
Grove - OLED 96x96
Actuator
IIC
223
Grove - LED Bar
Actuator
IO
224
Grove - Infrared Emitter
Actuator
IR
The software
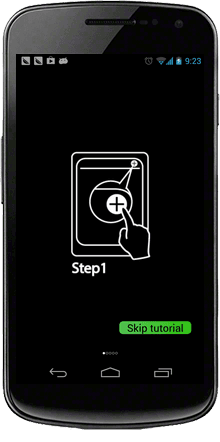
There is an application program for configuring Atom Node modules. The program is running on Android devices. During the configuration process, the screen area of Android device will flash to transmit encoded parameters to the Atom Node via a light-sensitive transistor. The configuration interface is shown below:
Usage
Atom Node is an open-source hardware solution for the Internet of Things, which can support several Grove sensors and actuators to gather physical data and perform certain actions. The Atom Node needs to be configured before being put in use. After configuration, several modules can gather and transmit data wirelessly through RFBee.
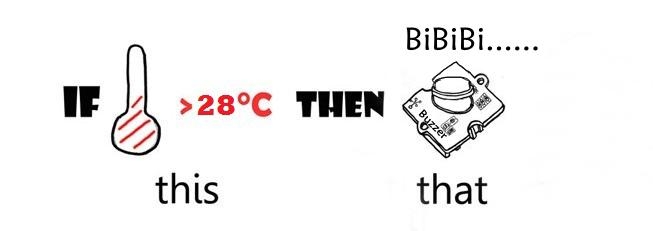
We would like to take the temperature sensor as an example to illustrate the use of the Atom Node. Let's try to make this happen: when the temperature exceeds 28 ℃, a buzzer will sound.
Preparatory work: Using the device, you need at least an RFBee/Xbee (when using only one Atom Node, it is not necessary) and an Android device (the Atom Node does not include it). If you want the Atom Node to work, they are essential. And please make sure the baud rate of the RFBee/XBee is set at 57,600. If not, you need to modify the configuration, using your own method or upload the demo of the Library file:RFBee to RFBee. Then download the application program package:BeaconUI and install on an Android device.
Demo 1: Use one Atom Node
Now using an Atom Node working in IFTTT mode, follow the steps below:
Connect a Grove - Temperature to ADC port and Grove - Buzzer to PWM port using Grove - Universal 4 Pin cables.
Plug RFBee in the Bee Socket.
Press the button on one side of the Atom Node to turn it on. The LED on the other side will light up. Then press the button again to make the Atom Node enter the configuration mode. Meanwhile, the user indicator is red.
Open the Atom Node app; you can see the following interface:
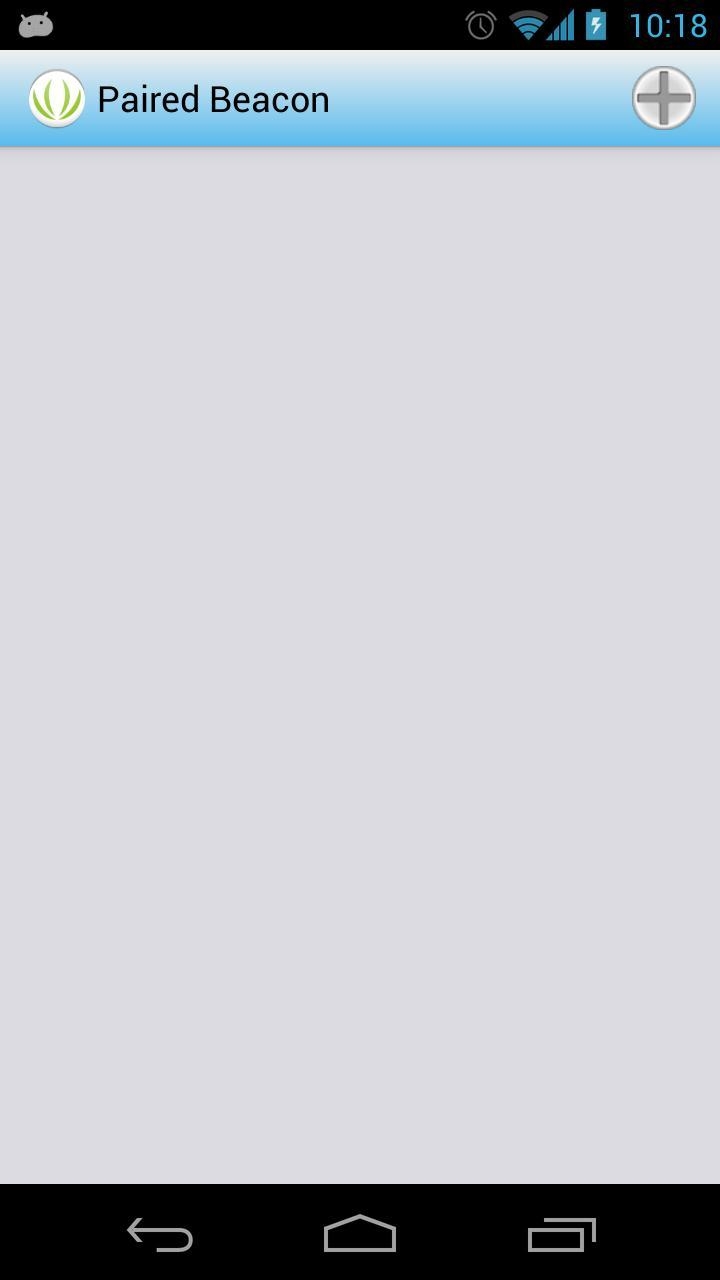
Click the plus sign at the upper right corner to add a device, a selection panel will pop up.
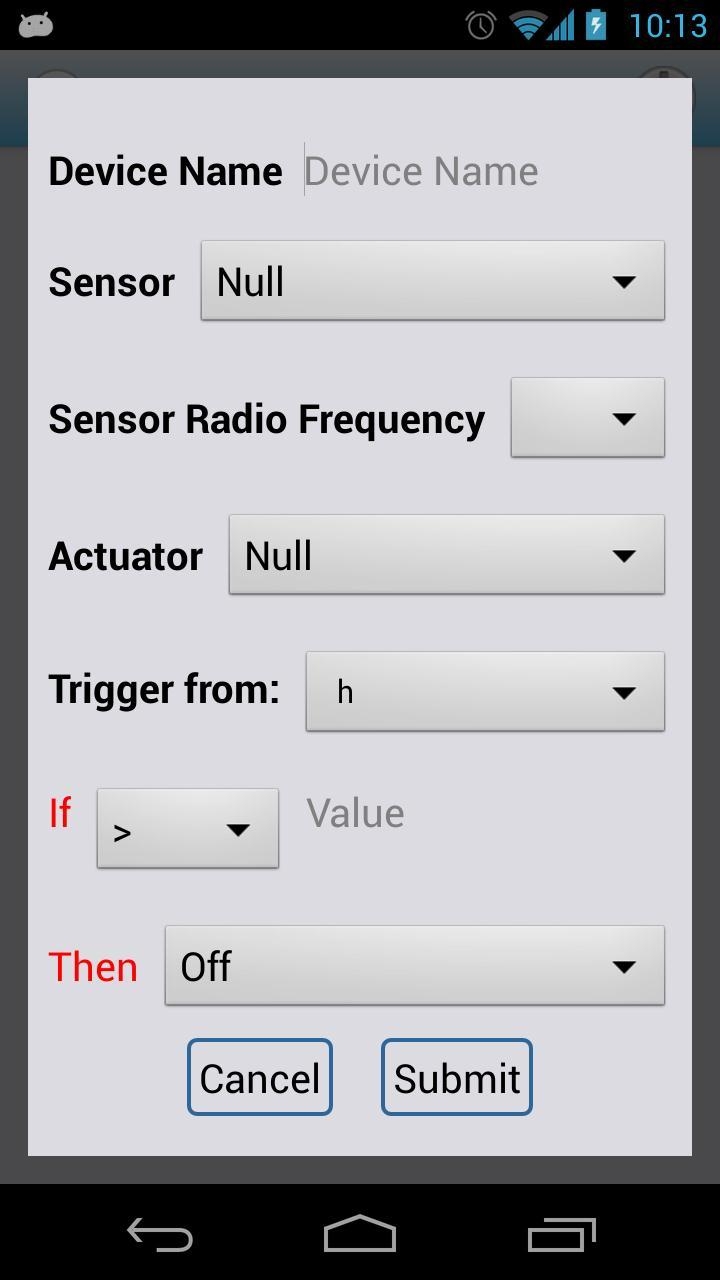
Let’s pause for a while to briefly introduce the interface.
1) Device Name: this can be any word. Such as “Sensor-temperature” or any word you like.
2) Sensor: choose a sensor.
3) The rest of the configuration is for the Actuator. If you don’t need one, choose NULL and the rest of the options are automatically ignored.
Now let's configure it and set the device name as "temp".
Refer to the picture below, Input "temp" as the device name. Choose "Grove - Temperature" in "Sensor" and choose "Grove - Buzzer" in Actuator. Choose any other options besides "Null" in "Sensor Radio Frequency", Input the "if" value and choose on in "then":
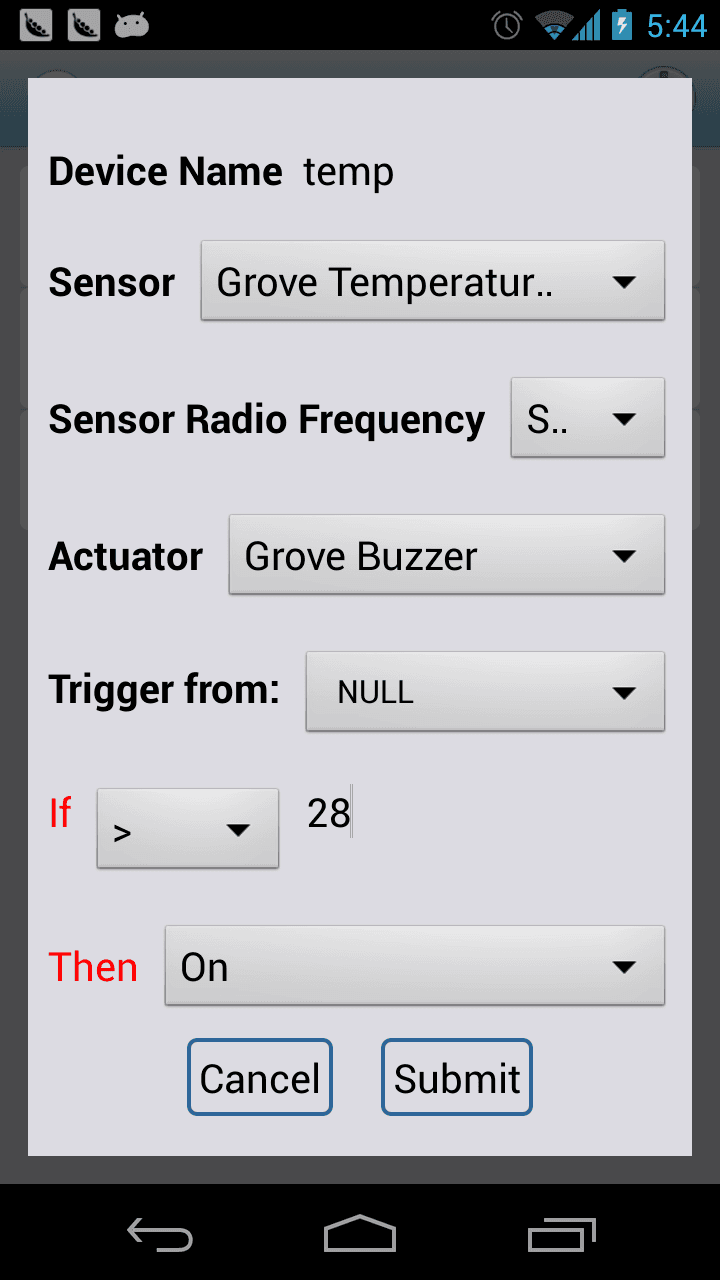
In indie mode, the trigger source should choose the device itself, therefore you should choose "temp" in the drop-down box of "Trigger from". But now there's only a "Null" option. Just ignore this problem. After you see the device name in the device list, you can reconfigure when the device name appears in "Trigger from".
Place it on the Android device screen. Note that the light sensor is facing the screen. It is better that the brightness of the screen is set to about 35%.
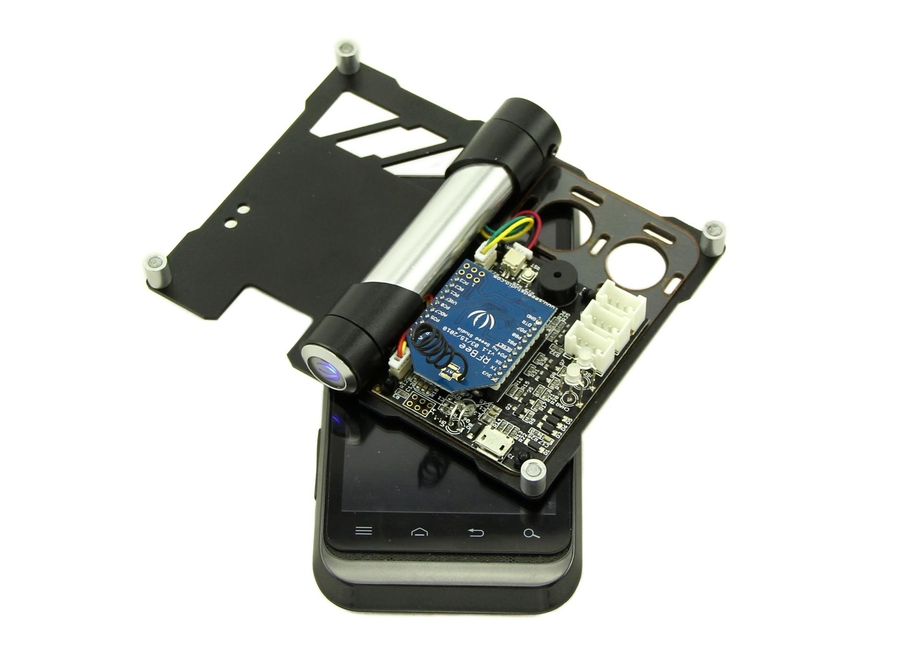
Click "Submit". It will start configuring. After successful configuration, the user indicator lights green and blinks.If the configuration fails, click Again. If it keeps failing, you can refer to FAQ.
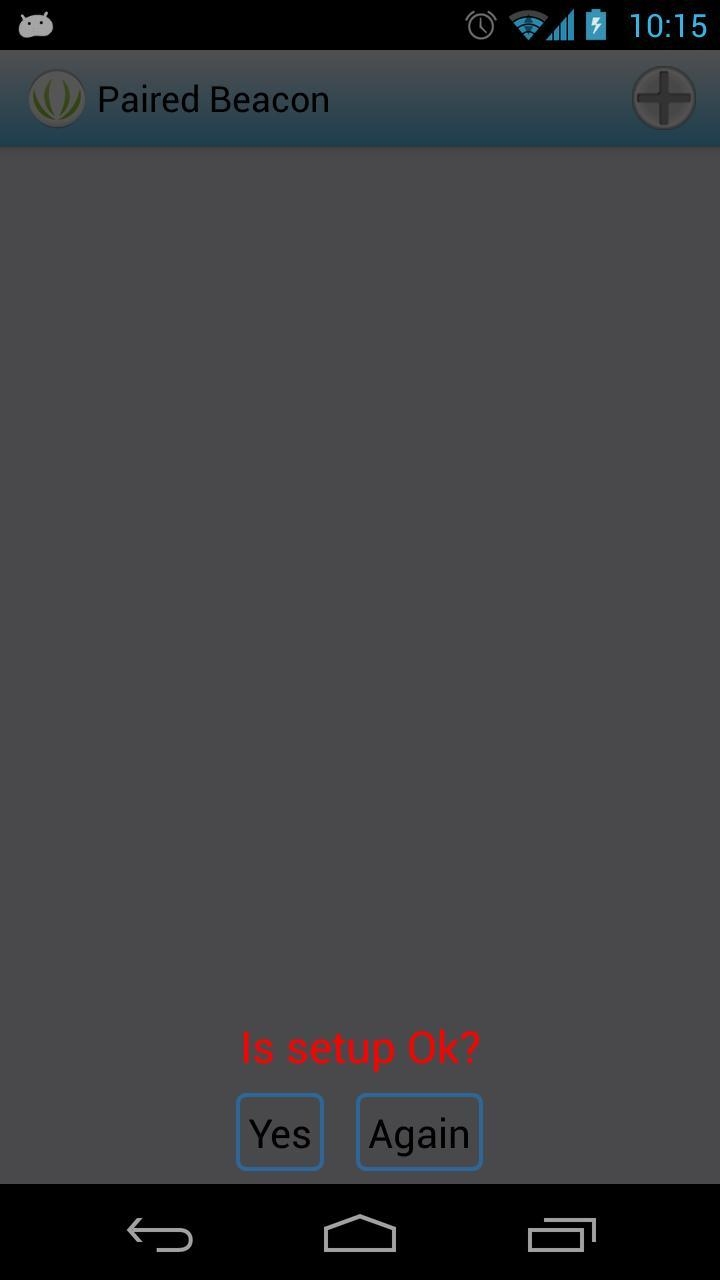
We have completed the configuration, you can see it in the device list now.
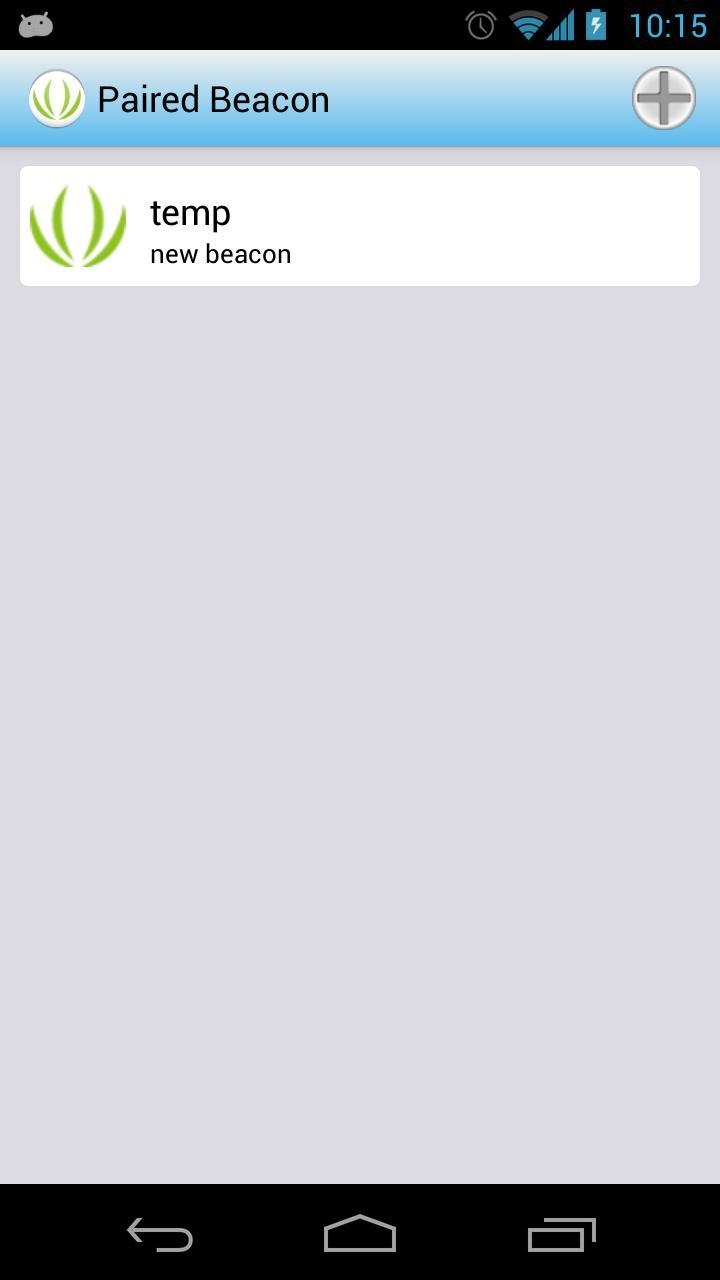
Remember that you have just selected trigger source as Null. You need to reconfigure it.
Once the temperature sensor reads a value exceeding 28 ℃, the buzzer will sound.
Demo 2: Use two Atom Node
Using two Atom Nodes working in IFTTT mode, you may follow the steps below:
Connect a Grove - Temperature to the ADC port of Atom Node and plug an RFBee (Baud rate 57,600) to the Bee socket.
Connect a Grove - Buzzer to the PWM port of another Atom Node and plug an RFBee to the bee Socket.
Open the Atom Node app. Click the plus sign on the upper right corner. We set the device name as “temp” and choose Grove - Temperature in "sensor" as follows:
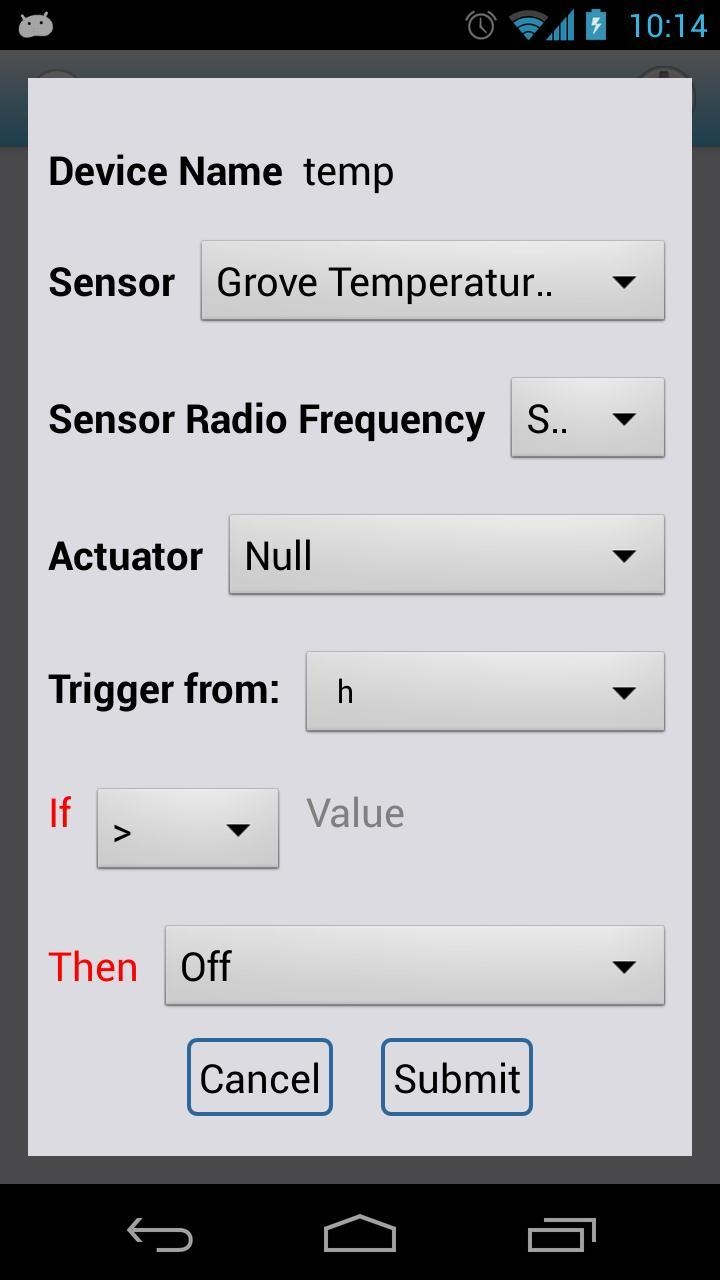
Turn on the Atom Node and enter configuration mode by pressing the button, then place it on the Android screen. Click Submit. It will start configuring.
After completing the configuration of one Atom Node, you can see it in the device list.

Then configure the other Atom Node, connecting a Grove - Buzzer in a similar fashion.
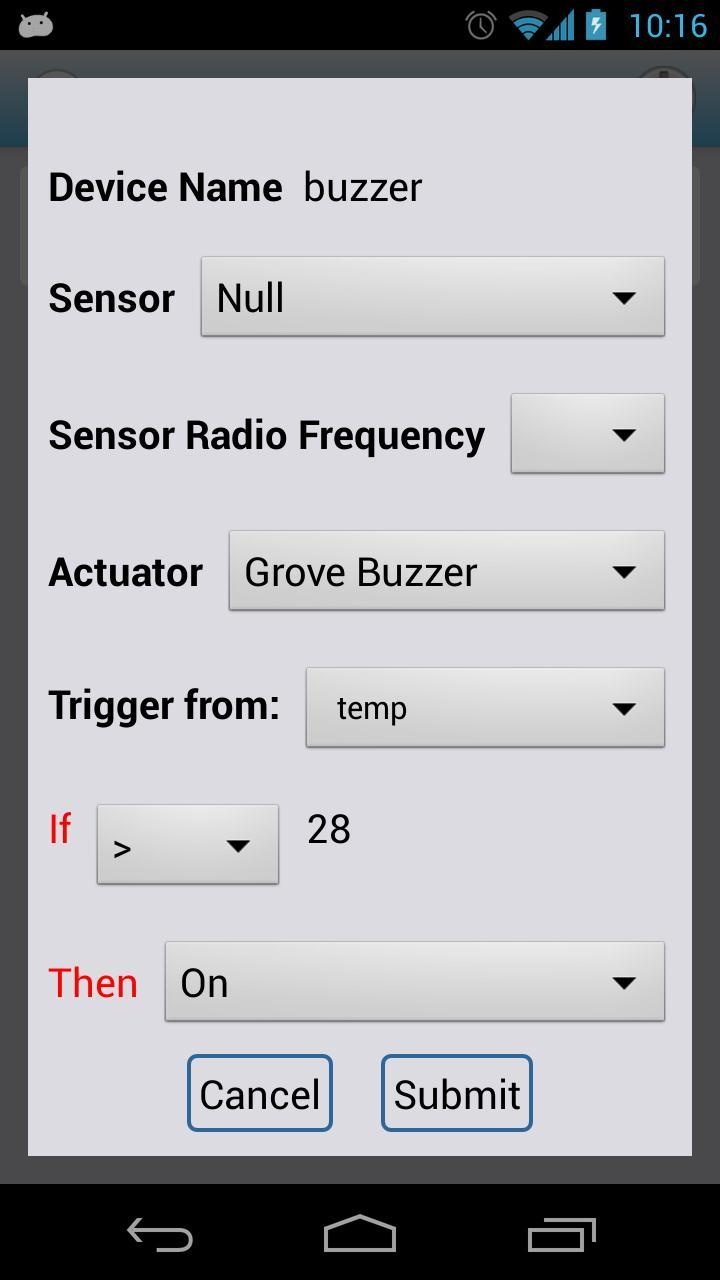
When configuring the actuator, set the actuator's name. Then choose the trigger source of the actuator in “Trigger from”. We would like to use the previously configured device "temp" to trigger the actuator: therefore we should choose "temp" in the drop-down box of “Trigger from”. There are some other trigger conditions and actions, like “If” and “then” which help you to build a link between a certain condition and corresponding actions. By the way, the “If” values should always follow the data type of the Sensor you used.
When the two Nodes have been configured, it will start working. Then you can see the user LED is green.
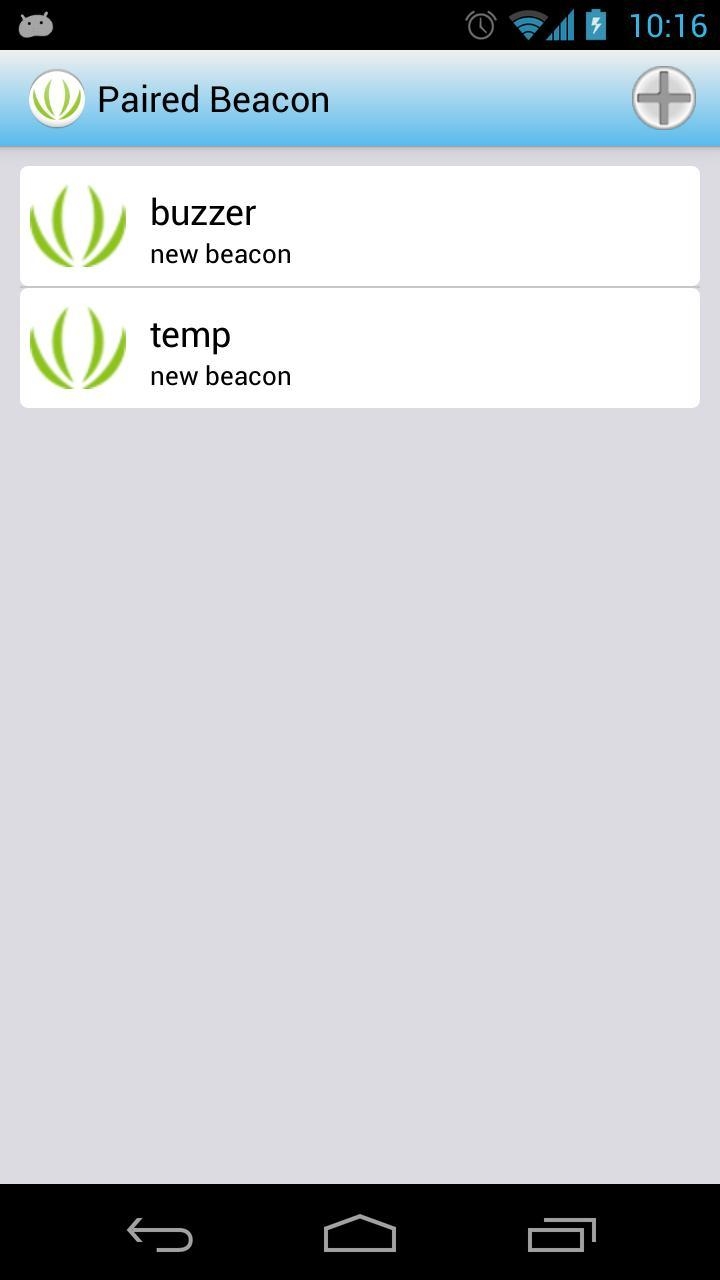
Work Status Description
**Operate**
**Status**
**Function**
Press the power button
Power LED will light(Blue)
Turn on the atom node
Press the power button after turn on Atom Node
Power LED is light(Blue),User LED will light(if unpair, User LED is red;After successfully paired,User LED is green and blink)
Enter configuration mode
Press the power button when in configuration mode
Power LED is light(Blue),User LED will off
Exit configuration mode
Long Press the power button
All LED will off and Buzzer will Sound
Turn off Atom Node
Double-click the power button
User Indicator will off or on
Turn on/off User Indicator
Four-click the power button
all indicators keep states
Clear data
Connect Atom Node to PC using USB cable
Charge LED will light(Charge LED is red in charge, After charging complete,Charge LED is Green), Power LED will light
Charge for Battery or update the firmware
Upgrade the firmware
Connect device and install the driver
Download the Atom Node Driver File and save it.
Connect the Micro-USB cable to the Atom Node and connect the other side of the Micro-USB connector to the computer's USB port.
Wait for the new found hardware prompt.If the installer does not launch automatically, Navigate to the Windows Device Manager and find the Seeeduino Lite listing.

Right click and choose Update driver. When asked to install automatically or from a specific location, select "Browse my computer for driver software".
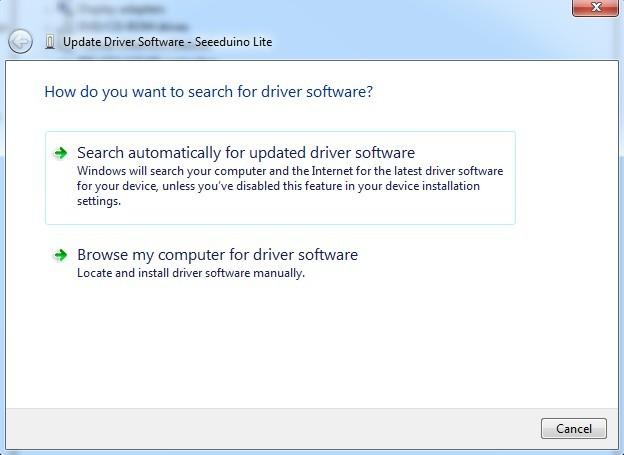
Choose "Search for the best driver in these locations", and check the box "incude this location in the search". Click the Browse button and navigate to drive you have downloaded. Select the drivers folder an click OK.
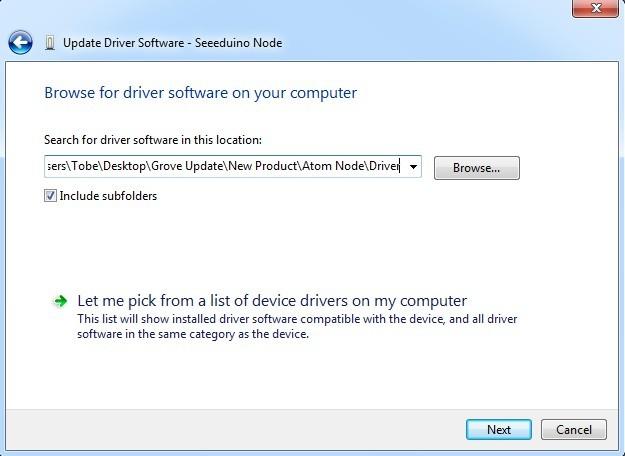
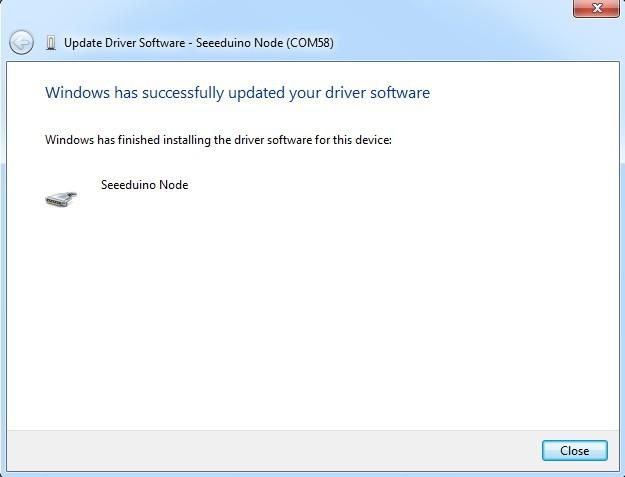
Modify File: boards.txt and USBCore.cpp
Open up Arduino-1.0.1/hardware/arduino/cohttps://github.com/SeeedDocument/Atom_Node/raw/master/res/arduino directory, replace the file:USBCore.cpp with the new USBCore.cpp.
And replace file:boards.txt with the new boards.txt in the path:Arduino-1.0.1/hardware/arduino.
Download the required library files and Atom.Node firmware
The latest Atom.Node firmware: https://github.com/reeedstudio/Atom_Node
The latest Atom.Node Library: https://github.com/reeedstudio/Atom_Node_Libraries
Upload program using Arduino IDE
Open the Atom_Node.ino of Atom.Node firmware file
Select Seeeduino Node from the Tools | Board menu of the Arduino environment. And select the correct port.
Compile and uplaod the code.
Now you have completed the firmware upgrade.
Resources
Last updated