
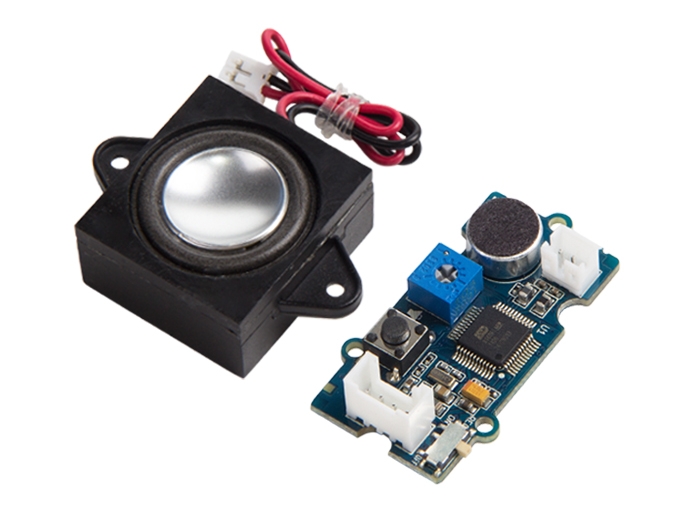
Grove Recorder v3.0
This is the latest version of Grove-recorder, and also the best version. Comparing the previous one, there are some updates that we would like to mention.
First change is MCU. In V3.0, the MCU is upgraded from to be ISD9160FI, which is more powerful than the old one ISD1820PY. How is it more powerful? Together with the newly added 2Mbytes flash, it allows you to record up to 83 seconds, much longer than previous 12 sec record.
Secondly, if you have ever used previous version, you would know that if you want to play back what you have recorded, you need to press another button on the Grove button that connected separately. In V3.0, we integrated the record button and play back button in to one button. By holding the button for 2 sec, it starts recording, by push the button quickly, it plays back what has been recorded.
What's new in V3
MCU from ISD1820PY to ISD 9160FI
Record and playback button
Record switch
2Mbytes flash
Features
Very long record time, up to 83s
Built-in button to operate
Built-in led indicator
Stand alone or control by MCU
Built-in Microphone
!!!Tip More details about Grove modules please refer to Grove System
Platform Support
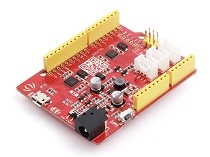
Arduino
Wio
BeagleBone
Raspberry Pi
LinkIt
![]()
![]()
![]()
![]()
![]()
Specification
Working Voltage: 3.3/5V
Working Current (@5V, 25℃)
Standby: 25-30mA
Recording: 29-35mA
Playing: 110-150mA
Working Current (@3.3V, 25℃)
Standby: 23-25mA
Recording: 25-30mA
Playing: 70-150mA
Working Temperature: 0~85℃
Size: 40x20mm
Weight: 31.5g
Hardware Overview
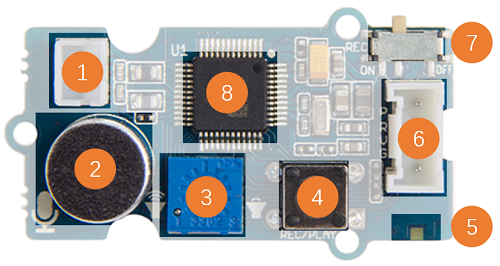
1.Speaker Connector - JST2.0
2.Microphone
3.Voice Control
4.Button
Short Press and Release: Play
Long Press: Start recording until release the button
5.Led Indicator
Red led, lights when button press
6.Grove Connector
7.REC Switch
Switch to ON if you want to control the module to record vis Software
8.MCU
Getting Started
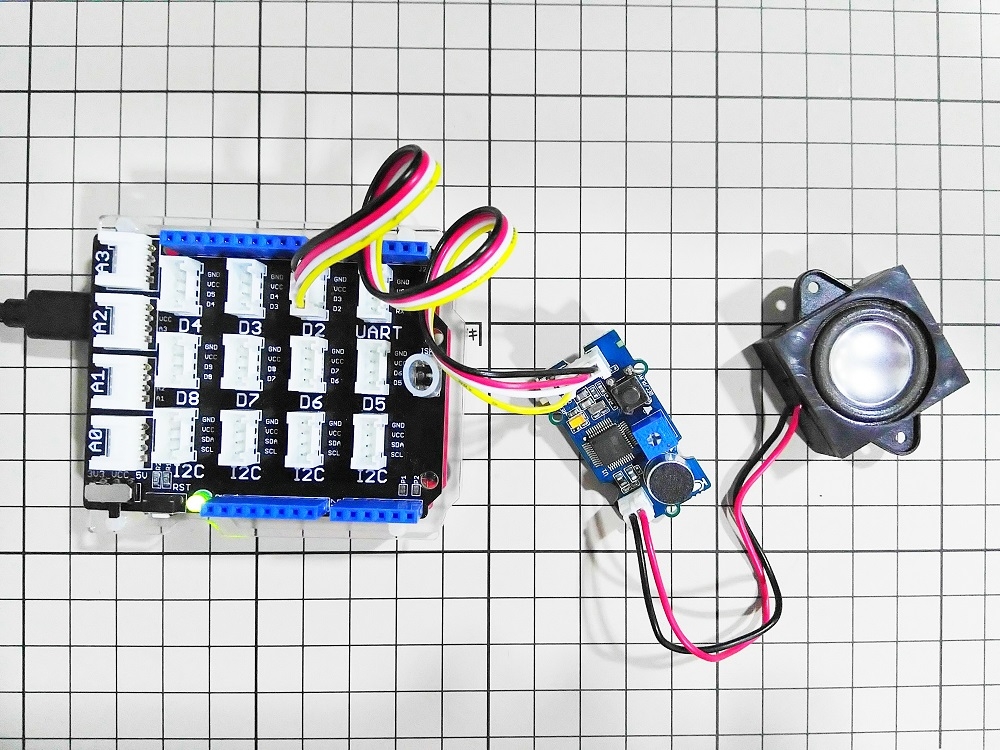
Here we will show you how this Grove - Recorder V3.0 works via a simple demo. First of all, you need to prepare the below stuffs:
Hardware Connection
Thanks to the benefit of Grove series module, you don't need to make soldering or bread board, what you need to do is connect the modules to the right port of Base Shield. For this demo, we connect Grove - Recorder to D2.
Standalone
This module can work standalone without coding.
Record - Press the button until the LED light, and it's recording, release the button when finish recording.
Play - Press and release the button to play the voice that had been recorded.
If you want to control the module by code. please go ahead.
Software
Copy the below code and paste to your Arduino IDE, and upload to your Seeeduino V4. After upload the code to an Arduino, then open the Serial monitor.
Enter Command
You can enter some command in Serial monitor:
Start recording - Enter a 'r'
Stop recording - Enter a 's'
Play - Enter a 'p'
Resources
Last updated